Sunday, March 16, 2014

Comin' in for a Landing (Strip)

With all the snow days we had these past two months, I was able to finish off a few sections of my apartment that I hadn't had time to work on since starting school. One of these was the little landing strip next to the front door of my apartment. I had a similar setup in my former apartment - I really like the IKEA shelf with brackets look, apparently.

Former Apartment (details)
Current Apartment


 Those who read my original apartment decorating post will notice the two new wall decorations above my little shelf. The Keep Calm sign is a Christmas gift from my parents - my dad found it at one of my favorite craft stores - Hobby Lobby. The little bulletin board is one I picked up in Big Lots for $3.00 and decorated myself. I knew that I wanted to spruce it up some, but I wasn't sure what angle to take. Stamping? Fabric?

Since I wanted it to match the Keep Calm sign, I eventually selected the airmail border as my inspiration, which would give it a nice vintagy-old world feel. I also liked the connection to international mail, since it makes me think of my friends overseas. Having seen others do a similar sort of design on bulletin boards (chevron stripes), I figured I'd pick up a few bottles of craft paint from my local Wal-Mart along with some masking tape and set to work!

Step One: Gather supplies!


Step Two: Outline border space and stripes. I decided to forgo the white stripes, opting to leave those spaces empty (and a little smaller).


Step Three: Paint! I counted/marked out the alternating colors ahead of time - luckily it all spaced out right (I'm not that talented!).


Step Four: Remove tape! I left it to dry for a few hours, but then I was impatient to see whether or not the paint had bled under the tape (my backup plan was to cover the board in fabric if the paint had bled!). Luckily, it worked perfectly!


Step Five: Embellish! I used a stamp that I had picked up at Michaels on sale a few months ago to really seal the deal on the airmail vibe.


 I wanted something to balance out the stamps on the right corner, but I didn't have any other rubber stamps that would work. So, I made my own stamp out of a mini jam jar I use to hold safety pins. It worked great, and after a little bit of online research for inspiration, I filled it in with text (Kandern is the name of a little German village I've visited three times for English Camp). Another nod to my international friends. :) And there you have it, my favorite little spot to pile junk mail and overdue library materials. :P

Saturday, March 8, 2014

Remixed Boot Tray

One of my brother's Christmas gifts this year was a boot tray, a handy little thing that serves as a catch-all for sloppy, snowy, wet boots. Before this winter, I would have never thought I needed such an item, but thanks to the massive amount of snow/ice we've had these past few months, I've realized it was an imperative addition for my apartment entryway.

My Inspiration
While my brother's tray is nice, it's a bit of an eyesore - since my entryway is part of the same space as my living room (and kitchen), I wanted it to add to the décor of the room. I found this idea on Apartment Therapy and fell in love. The original poster used a LADIS lid from IKEA as her tray base, but unfortunately, IKEA no longer sells that type of container. I searched high and low during my last visit, only to be met with disappointment. *sigh* So, onto Plan B.


Once I confirmed that it
wasn't super-valuable, I
colored over it's original
gold eyes with a brown
Sharpie, turning them a nice
(and more updated) bronze.
I searched and searched for a suitable black plastic lid at various stores but kept striking out. I also perused trays, but those were often too expensive (the LADIS lid was $3.00) or too cute to be used to hold dirty boots (like this one, from IKEA). My mom also pointed out how small my available space was - opening my front door leaves an area of about 11" between door and wall. I had my work cut out for me. Enter Ohio Thrift, a locally-based thrift store chain that I recently discovered while visiting friends. Needing a little bit of a pick-me-up after dropping my mom off at the airport the other week, I found myself browsing the aisles, sizing up items and scavenging shelves. I had a good feeling, since during my last visit I scored this little fellow (right) for $1.99! In the midst of my wandering, I found a few contenders for my boot tray, but they were all discarded when I found a deeper black wooden tray for $2.99. I sized it up in the store but hung onto the receipt, just in case I needed to return it for another option later. Luckily, I didn't need to! I brought it home, cleaned it up, and filled it with four bags of black river rocks from Dollar Tree. End result? Awesome functionality.


My mini entryway - the door passes
right over the tray without catching.
Also, please note the mini snow shovel,
bag of kitty litter, and ice scraper.
My Version!
Yes, these shoes are props. ;)

Sunday, March 2, 2014

The Great Cover-Up

... with curtains! I realized that I never posted an update about my curtainless (but frosted!) living room windows, so, without further ado, ta-da!


 Don't get too excited - they're from Family Dollar. Or Dollar General. I had all these grand plans of making a window cornice, even finding this great tutorial... but, I hit a decorating wall (coupled with an onslaught of schoolwork - lesson-planning, grading, reading ahead, oh my!). So I wimped out and purchased a few light-colored curtains from the dollar store. Not the best quality, but they look pretty good up there, and they offer a nice neutral framing for the windows (as well as hiding the glaring holes left behind by the removal of whatever hardware had been there in the past). Because the windows are adjacent to each other, I opted for one long rod to thread both curtains on. Initially, it bowed in the middle (doh!), but I quickly solved that with a well-placed screw hook. It blends right in when the curtains are pulled together. WIN. Also, the top picture below shows more of the true color of the curtains - they are a light cream color (not yellow).


Another place that received a curtain upgrade was the wire shelving unit that I use as pantry/storage overflow (you might remember it from my original new apartment post). I purchased a window panel from the dollar store (high class around here, folks) and trimmed it down to size, using the hot-glue hemming method. I wanted the shelf to blend into the wall more, so I picked a neutral shade. To attach, I just split the hang-loops and tied them off on the top wire shelf. However, there was still a glaring problem:


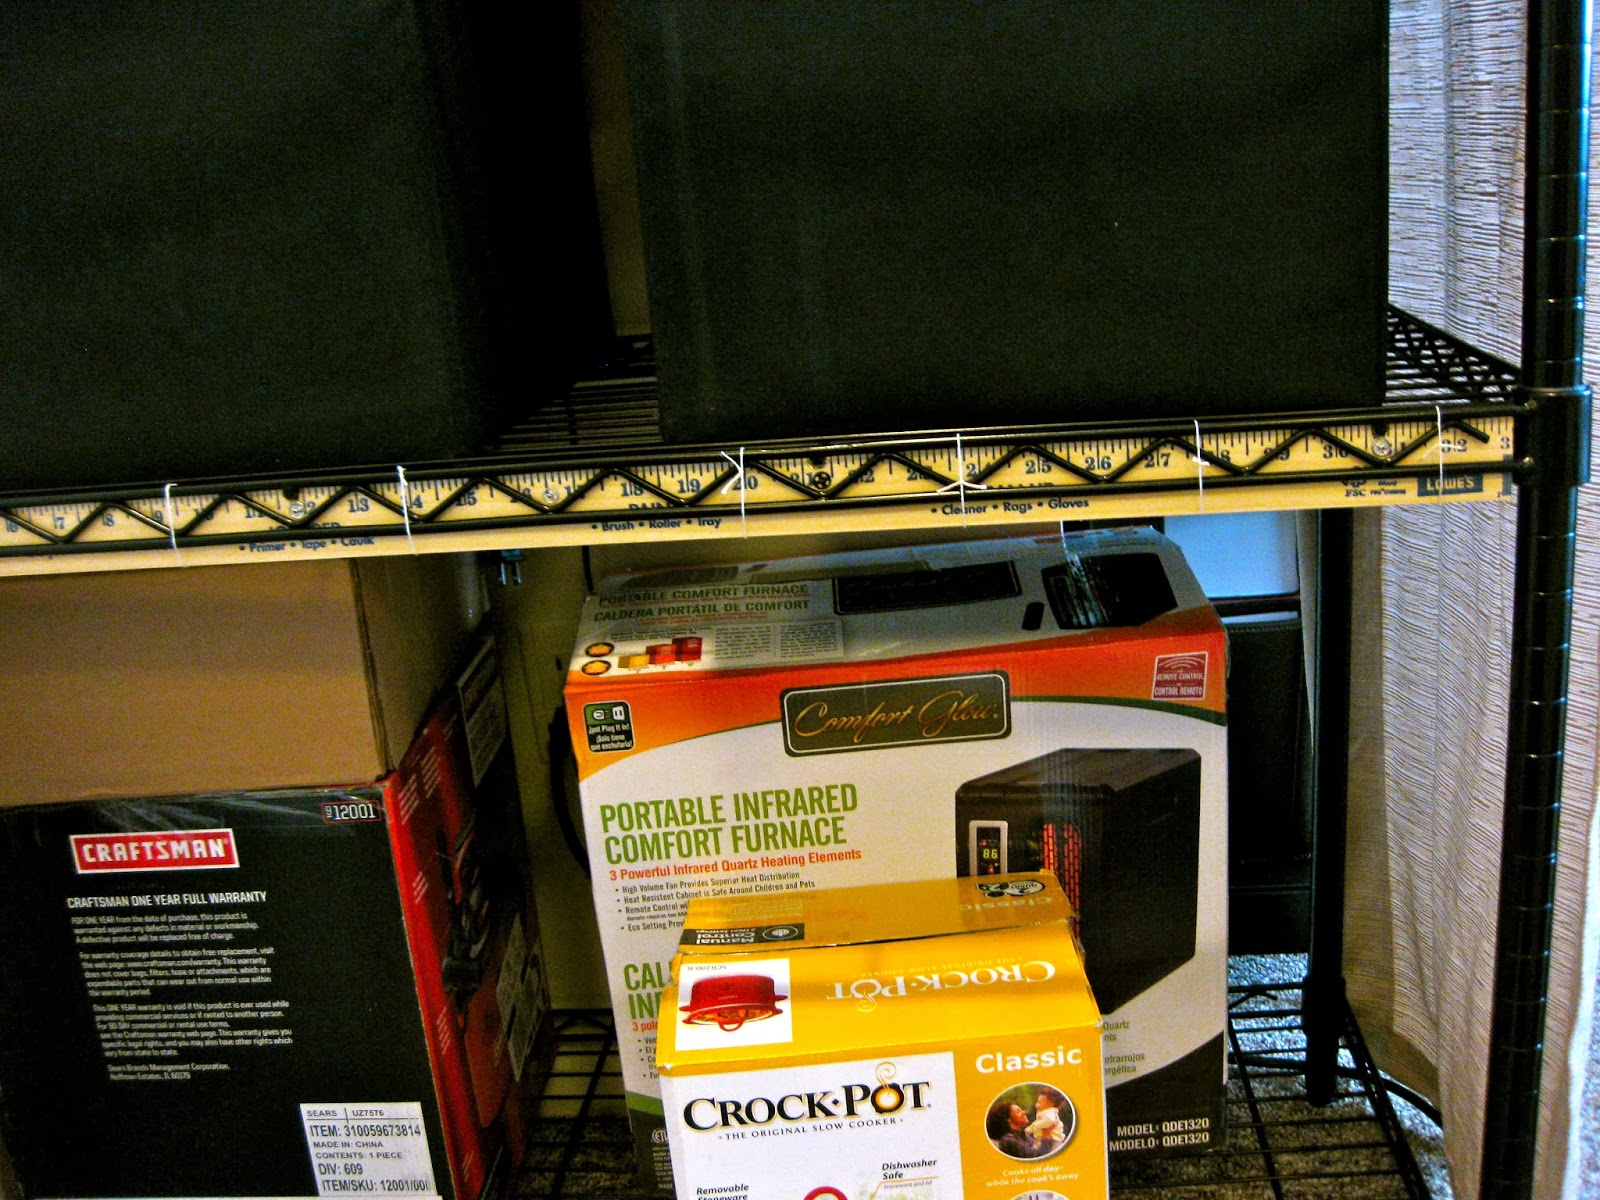
Yeah, everything was just hanging out on the bottom rack (mostly empty boxes for storing items). Luckily, I had leftover fabric from the side curtain, but it wasn't enough for a single-paneled curtain of that size. So, I decided to make three smaller ones instead! Since I wanted a smoother look at the bottom, tying them off wasn't an option. So I devised a plan involving snaps, a yardstick, and felt.

Add caption
Add caption
After measuring, I drilled out a few notches in the yardstick to ensure a snug fit (there were wire rungs in the way of making it flush). After adhering snaps, I used twine to attach the yardstick to the shelf (zip-ties probably would have been better, in hindsight).


Then after some more measuring and cutting, gluing and the tiniest bit of sewing, I snapped my panels into place! Dontcha love how I gloss over the tedious parts? ;)

Snapping it on!

Two on, one to go!

Finished effect - looks more like pleats than separate curtains.
Also, they need ironing, I'm aware.

And, here you have it! The finished product! Much nicer, don't ya think?