Showing posts with label book. Show all posts

Sunday, December 7, 2014

Brave New World Bookmarks


At the end of each semester I give a little gift to my seniors (non-food, since that's illegal #ThanksMichelleObama). Since my seniors spend a lot of time outside of class reading an assigned novel (Frankenstein in the fall, Brave New World in the spring) and the last few weeks of class completing a multi-genre project on it, I’ve developed a tradition of giving them bookmarks made from the pages of their particular book. I’ve posted about this craft before, but I did something a little different this past spring.

The first steps were business as usual – pulling out pages from my chosen text and trimming them down to size (I always try to center the book’s title at the top).


However, Brave New World stymied me when it came time to choose an accent detail. Typically I’ve stamped a design of some sort on each bookmark, but I kept coming up empty with Brave New World. So, I decided to utilize the key icons of the book (Greek letters indicating castes) and replicate them on the bookmarks by hand… after looking them up to make sure I drew them correctly!

After making my ‘key,’ I selected a few colors and drew each letter in a variety of shades. Since I knew the higher castes would be more popular (duh!), I allocated them a larger number of bookmarks.


Once I had my bookmarks prepped, I ran ‘em through the laminator (my favorite thing to do!), cut ‘em out, and then used my nifty corner-rounder to finish 'em off. Tip: If you’re going to round corners, wait until after laminating – that way you only have to do it once. A good corner-rounder will punch through laminated paper just as well.


Lastly, I added a little sticker label to the back of each bookmark with references that encompassed the scope of the class (‘epic’ refers to Beowulf, the first text we read at the beginning of the semester). And, there you have it! Maybe not as neat as their stamped cousins, but my students didn’t know the difference. ;)

Friday, June 6, 2014

Scavenging for Gold(ing)

One of my sophomores' favorite activities this past year was a scavenger hunt that I planned in conjunction with The Lord of the Flies. Students were divided into groups and given lists of items that corresponded with Golding's novel.

Their lists read:
  • Something fair-colored for Ralph
  • A rock that reminds you of Roger
  • A leaf that reminds you of Simon
  • Something identical for Samneric
  • An item that reminds you of Piggy
  • Something sharp for Jack
  • An item that has a scar on it
  • An item that could be used to make fire
  • A "beastie" - no live things, please!
  • A flower to represent the island's beauty
We went outside during each period (even though it was a slightly chilly/overcast day - but no turning back!) and groups set off with their lists and brown paper bags (an easy way to moderate the size of the items they collected).

and flowers, oh my!
Rocks,

and sticks,


It was a lesson that definitely required some prep-and-planning time, but I'm sure it's one my students will remember. We all had a good time hearing different groups present their findings - there were some repeats, but even those provided good discussion points. I ended up taking pictures of what the groups collected and created a Powerpoint to share with them (different periods had different ideas, and one period missed the activity entirely due to a career fair... yup, thanks for the heads up, Office People... not). It was fun and a pseudo-review activity, as students sought to make sense of each group's item choices. Here are some of my faves:

Straw = Ralph's "Fair" Hair

Items for Piggy - The striped rock was "unique and different,
like Piggy" and the TruMoo milk has a... farm animal
connection, I think? Haha


All of the "sharp" things for Jack - thorns, a broken pencil, a nail,
some sort of metal stake, various sticks, a pointy rock, and a shard of plastic.
Leaves for Simon - a dead one (yeah, spoiler alert!) and an 'unlucky' and 'odd' three-leaf clover
that only has one leaf (they definitely plucked off the other two, lol)
All of their "beasties" - a few things that look like snakes, a 'caterpillar,' the bear on the Kodiak tin (*eye roll*),
and a few other items that had less-compelling rationales (one was literally described as "pea-pod thing").
My favorite items with scars. A lot of students ripped holes in leaves,
which made me wonder about their understanding of the term "scar." :P
The most ironic items - huge rocks that represented either Roger (rock) or Piggy (huge).
Get the irony? Get it? Major bonus points if so! :)

After the groups presented (and left for the day) I threw away most of the items (so many dead flowers and leaves!) and had a few students return the large rocks to their natural habitats, so I was glad for the photos. It was definitely a fun, creative activity that I hope made my sophomores' LOTF experience the slightest bit more enjoyable. ;)

Tuesday, April 22, 2014

Paper Chain Countdown


A few months ago, a chain made out of construction paper appeared in the teacher's lounge. It had alternating links of red and white (our school colors) and while it did lend an air of festivity to the place, I wondered aloud why it was there. Another teacher informed me that the art teachers had made it for a teacher who was retiring this year. Each link represents a day he has left, and at the end of every day he breaks one off. I must say, it's been fun watching that chain shrink these past weeks (c'mon summa time!), so when my mom, who is also a teacher, confided to me her shared eagerness for the approaching summer, I decided to make a little countdown chain for her to enjoy as well!

-o-o-o-o-o-o-o-o-o-o-o-o-o-o-o-o-o-o-o-o-o-o-o-o-o-o-o-o-o-o-o-o-o-o-o-o-o-o-o-o-o-o-o-o-o-o-o-o-

For my links, I selected a cheery yellow cardstock and selections from Sense and Sensibility - quite the combo, I know. ;) I wanted the chain to be travel-sized, since I was mailing it to her, so I made the links as small as I could (using my stapler as a guide).


After creating my chain of 29 links (the number of schooldays she has left!), I added a little clarifying tag to the chain's end. And yes, I'm the kind of person who purchases green staples. Because I can.


Luckily, I had the perfect-sized box to package my chain. After lining it with tissue paper, I coiled up the chain and nestled it inside. I tucked in a little note as well (Mary Call is a little inside joke, as I've previously mentioned). It's set to arrive this week (during which she's on Spring Break, conveniently, so I could safely settle on my number of chain links). It was such an easy craft, and I hope it offers her encouragement in the days to come!

Thursday, April 17, 2014

Easter Treat Repeat

I whipped up some Easter treats for a few coworkers this year - they might look a little familiar, as they bear a striking resemblance to these little treat boxes that I made for friends last year. ;) I scored these cute little candy holders at Target around this time last spring - I lined them with some tissue paper, filled them with jelly beans, and tucked in a little handmade sign that is simultaneously cheesy ("hoppy Easter!") and literary (I cut out the bunny silhouettes from a copy of Sense and Sensibility). 


There in the ground His body lay
Light of the world by darkness slain:
Then bursting forth in glorious Day
Up from the grave he rose again! (more)

Monday, February 3, 2014

Door Décor: Winter Sunburst


Since taking down all my Christmas decorations, my front door has been a stark, sad site. I knew I wanted to buy/make something winter-y to put up there, but I just couldn't figure out what to do. Many ideas I found and liked seemed a bit Christmas-y (you really can't get away with decorating with anything evergreen out of season), and the others seemed to involve hanging a pair of ice skates from a wreath. Don't get me wrong, that's certainly winter-y, but it's also slightly expensive (do all these people just have vintage pairs of skates lying around? Because a pair from eBay seems to run anywhere from $15 to $30, plus shipping). Yeesh. Also, ice skates seemed a bit clunky to store in the off-season (and space is premium at my little semi-studio).

Pinterest gem!
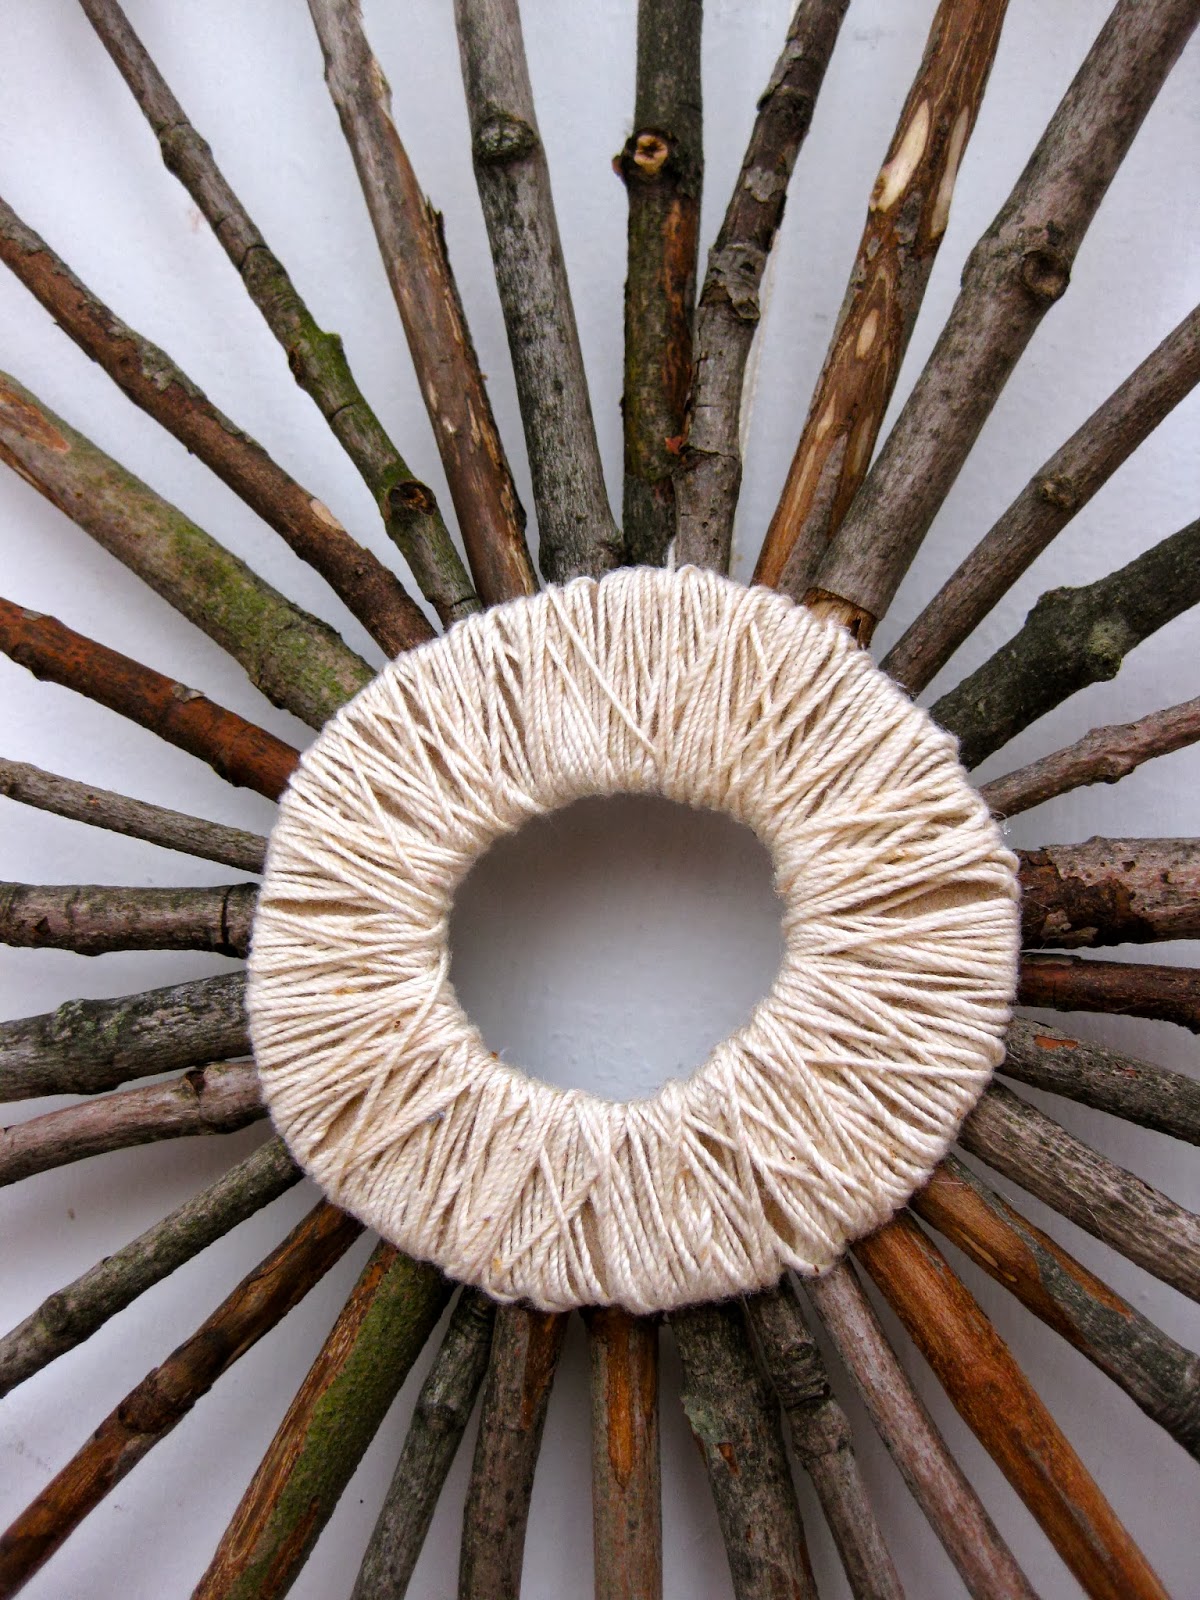
Thankfully, I kept up the search and turned up this little gem on Pinterest. The directions (found on some versions of this pin) were ridiculously oversimplified pictures, the hallmark of a future Pinterest fail, but then a little more digging turned up the original source for the craft - a legitimate craft blog with complete directions and everything! With the assurance that this was a realistic craft, I began gathering my own supplies in earnest. This mainly involved scouring the yard in front of my apartment building for branches and twigs - but I had to wait for the plethora of snow to melt first! I was also glad that the trees around my apartment have a darker-colored bark than the willow twigs pictured, since I have a white door. After breaking down the branches and twigs into usable pieces, I went to my local Wal-Mart for jute twine... and couldn't find any! So, I decided to use what I had on hand, which was plain old twine. I wasn't sure how it would turn out at first, but after wrapping it around a cardboard ring that I cut out (following the blog instructions), it turned out pretty well.

 I ended up estimating the amount of twine I would need, then cutting it from the spool (in order to loop it around the ring). To keep it from tangling, I wrapped it around a clothespin, using it like a needle, if that makes sense. Originally, I had made some paper blossoms out of book pages to adorn my sunburst (following the directions from this site), but I felt that the look was a little cluttered once the twine-wrapped ring was completed. The pics below show what I mean (sorry for the bad quality - night-crafting strikes again!). The left photo was more of a concept shot, before adding the ring and another round of twigs.

The roses are so cute...
... but I just felt that they hindered the clean
lines of the finished sunburst.


 The construction was simple, once my ring was prepped - I simply hot-glued the twigs in sets (four, then eight more, then sixteen) to ensure even spacing and balance in the finished product. I love the random, messy look of the example one, but I seriously doubt I could achieve the same. And, let's face it, I'm meticulous. :P I contemplated leaving the ring in the back like the original picture showed, but I liked the look of the wrapped ring. Good thing, too, since the hot glue looked a hot mess when I was done! I kind of took liberties knowing it would be hidden - and maybe it shows. But nobody will see! Except people reading this...


A quick note on hot glue - if you have a door that gets direct sunlight and tends to cook your door hangings, the glue is probably going to melt. My door barely gets sun (and most winter days in OH seem to be overcast), so I'm not too worried. All in all, once the twigs were gathered, it was an easy evening project, and I love how it turned out! Wintery, natural, and still mod-chic - sunbursts are so popular at the moment! Happy Winter, everyone (we have ANOTHER snow day today... bye, bye Spring Break)!

Wednesday, December 25, 2013

A Merry Little Christmas Party

Last year I co-hosted a Christmas party with my brother to inaugurate his new basement and, of course, to celebrate the holidays! Since I never shared any of the crafty decorations I made for it, I figured a solid year later would be perfect timing. :P


Using some of my favorite crafting media (book pages, branches), I set about making decorations that incorporated materials that I had on hand, or could obtain for cheap. One of my favorites turned out to be the little trees you see lining the window sills above. I got the idea from my bestie, Martha Stewart - the original craft is for place cards, but they made the cutest accents as well. And after the party, I sent them home with guests as mini favors.

The sprigs I snipped from greenery in surrounding areas (like my apt. complex, outside my office, on the way home...lol)

Continuing with the natural theme, I looked for ways to incorporate branches and fresh greenery into the décor.

Always have to have the red and green M&Ms!


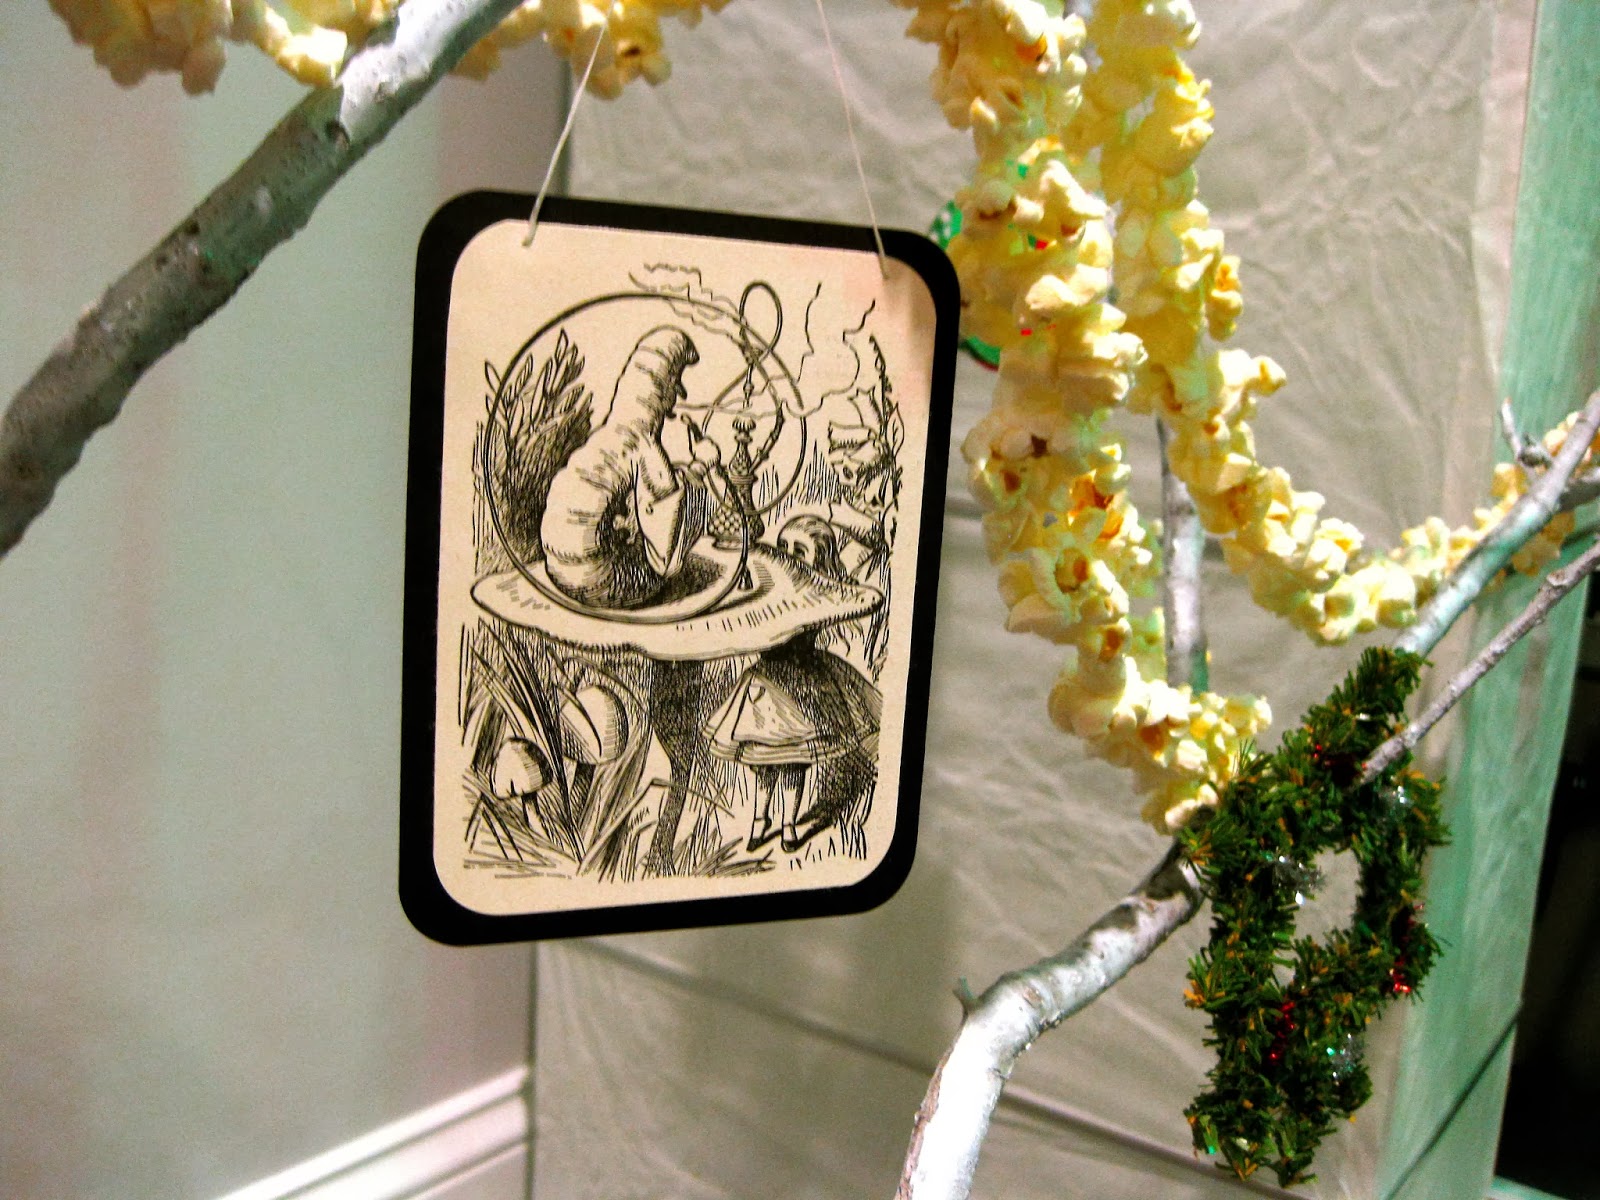
Evergreen sprigs, bits of holly, pinecones, and magnolia leaves worked as well to bring a bit of the outdoors inside. Going with the whimsical, I framed out illustrations from a copy of Alice in Wonderland to hang from the branches of my arrangements. The largest one I adorned with popcorn garlands and mini wreaths in addition to a few paper ball ornaments I made with leftover pieces of patterned paper.


I also used a few of the pages to line the backs of cookie-cutters, turning them into ornaments. Another Martha-inspired craft, although the original craft used wrapping paper instead of book pages.


You might have noticed the little paper trees peeking in the background of different pictures - they were really simple to make, instructions here!


I also used book pages to make a banner (I drew on the letters with Sharpies)...


... and these really sweet wreaths! They were a little time-consuming, but not very difficult. I used some German playing cards that I had on hand to cover the center portion where it tends to get messy (where all the cones come together). You can find the tutorial I used here.

The icicles are just tissue paper!


Cheery fire


A few other fun accents were paper chains, paper medallions, and cheery luminaries lining the front walk. The paper medallions were made using seventeenth-century newspaper articles I had printed out for one of my grad classes (recycle, right?) and old Christmas cards for centers. The luminaries consisted of red paper bags layered over white ones - I used an Exacto knife to cut out a simple design on each of the red bags, then placed Mason jars with tea lights inside (it was a windy/rainy night, if I recall).


We had a full potluck dinner, complete with an impressive variety of desserts, and a white elephant gift exchange, where I'm pretty sure this was the top steal. :) A fun time was had by all who attended!