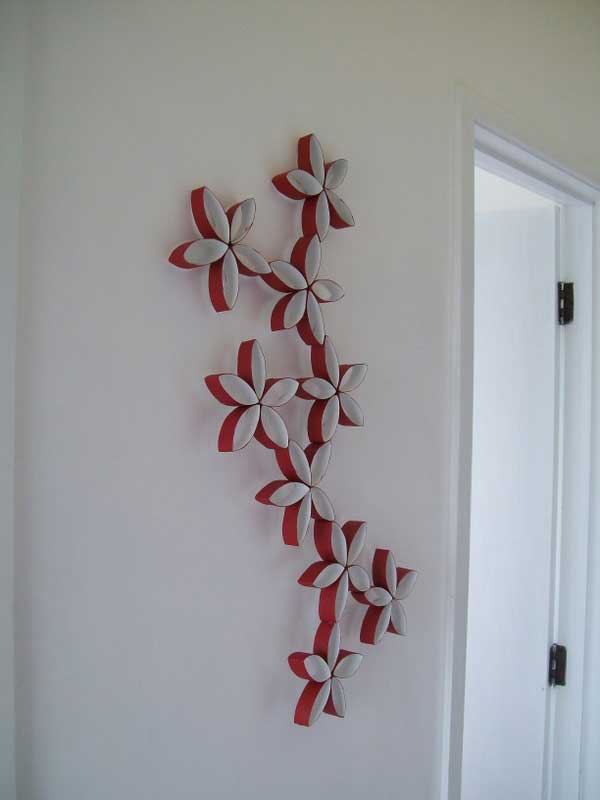
A popular trend that I've been seeing online lately is that of toilet paper roll wall art. No lie. These creations are awesome, and they're made of re-purposed toilet paper rolls.
Inspired by the above right image, I decided to craft my own toilet paper roll art for my poor bare front door (I took down my
winter sunburst a few weeks ago and haven't had time to make a replacement). I knew I wanted something red, white, and blue, since July 4th is right around the corner. So, I set about collecting my supplies (I ended up using three toilet paper rolls and one paper towel roll) and getting to work.
Step One: Painting! I decided to make five flowers, so I painted my three toilet paper rolls (one per flower) red and my paper towel roll blue (out of which I'd make two blue flowers). Luckily I already had red and blue paints on hand, leftover from
this craft.
Step Two: Cutting! After the paint dried, it was time to slice it up! A few sites recommended using an X-Acto knife and a cutting board, after meticulously measuring and tracing lines... I used a ruler, marked out sections 3/4" wide down one side of each tube, then sliced them apart using my trusty old scissors. ;)
Step Three: Gluing! It definitely would have been faster to use my hot-glue gun to attach my segments together, but since I was going to be hanging my creation on my front door in June, I knew it would all melt off. I opted for Tacky Glue, which I had on hand, and which will hopefully hold up to the baking sun. *fingers crossed*
 |
| I first attached the 'petals' together in sets of two. |
 |
| After drying all day, I added my third 'petals' into the mix to dry overnight. |
 |
| The next morning I was ready to combine my sections... |
 |
| ...into a complete flower! |
After all my individual flowers dried, I then started laying them out in a variety of patterns until I figured out my final design. I then glued-and-waited one last time (overnight), and the following morning I had my door décor!
 |
I was so glad I had these mini-clothespins (leftover from my 2013 birthday bash) in my craft supplies -
they were super handy for this project! |
 |
While I originally liked a vertical layout, I realized it
needed to be horizontal to accommodate my storm door. |
 |
There's a better, unobstructed view. :) Also, please ignore
the blurred out apartment numbers - privacy, yo! |
Sorry for the blinding-sun vibe on that last pic - the colors of the flowers really weren't coming across in the photo, so I lightened it. I think I'd advise painting the inside of the 'petals' so as to really make the colors pop (maybe a touch-up for next year, if they weather the next few months!). Spray-painting would be an easier route in that case, I'm sure. At any rate, I'm pleased with it and glad to try a new craft that didn't cost a cent (I used a bit of on-hand jewelry wire to hang it)! And, since I am heading off on a grand adventure to Texas tomorrow (by way of L-ville and a certain Texan man of mine), it'll certainly do. ;)