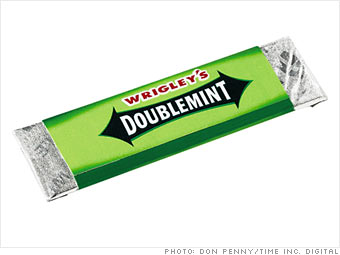
Growing up as a child of the nineties, I remember the first time I discovered gum wrapper chains. I thought they were SO. COOL. What I don't remember is how I learned how to make them - I'd love to attribute it to ingenuity, but maybe it was a step-by-step guide in my
American Girl magazine. Let's just say it could have been either, ok? Giddy with my new skills, I made a loooooong chain of my favorite Wrigley's gum of the time (Juicy Fruit) which then proceeded to hang on my bulletin board until... wait, is it still there? Possibly. I initially wanted to make it into something 'functional' (like, you know, a necklace... that's functional, right?), but unfortunately that never happened. However, before you scoff and relegate gum wrapper chains to the wasteland of camp lanyards and friendship bracelets, you should know two things. One, the
longest gum wrapper chain in the world is made of 1,688,930 wrappers (knowledge is power!), and two, I was able to incorporate this skill into the daily operations of the academic office where I work as a graduate assistant. Yes, it's that versatile.
Here's the story: A few months ago, my boss asked me to update our office's bulletin board in the main lobby of our building. He wanted it divided into three sections, but since I work in an academic building and not an elementary school, supplies like butcher paper (great for backdrops) and borders (self-explanatory) aren't really accessible. Which, in hindsight, might have been a good thing - this is a bulletin board in a college building, after all. I mulled over how I could divide the sections, and it came to me - the GUM WRAPPER CHAINS of my youth!
Our office has a pretty respectable supply of colorful paper for flyers and handouts and such, so I took
three of the brighter colors to frame out the section titles, then mixed the two bordering colors of the adjacent sections in a gum-wrapper-chain-like manner. Check out the results:
Pretty simple, I know, but while I was making my paper chains, I had lots of people express curiosity about what I was doing, and it turns out, saying, "I'm making gum-wrapper chains," wasn't enough of an explanation. So, I figured I'd dedicate a post to explaining the how-to... which didn't go as well as I thought it would. Let me explain...
Step 1: What should have been "Buying Wrigley's Gum." However, it turned into "Asking Roommate to Pick Up Said Gum Since I Don't Go into Convenience Stores at Sketchy Gas Stations in PG County." Because she goes to Wawa on her way home sometimes, and I'm always at sketchy gas stations since they have the cheapest gas.
Step 2: What should have been "Separate the Foil Wrappers from the Paper Wrappers." Because remember how they used to have both? Remember that? Hold on to that memory, folks, because THEY DON'T DO IT ANYMORE! And haven't apparently, since
2010. I unwrapped my little pack of Doublemint, expecting to see what's pictured at below left, only to encounter the disappointing wrappers at below right.
 |
| Double-Layered, Vintage Wrappers |
 |
| Cheap, Sad Modern Wrappers |
Step 3: Folding process - this actually came out okay, however, unbeknownst to me, I was setting myself up for failure here.
 |
| Blah, blah, blah, you get all these links! |
 |
| Folding Lengthwise |
 |
| Folding Widthwise (should be a word) |
Step 4: What should have been "Linking Up the Chain," but, since the new wrappers are all weird, I forgot to tear them in half (you are supposed to separate the rather long paper wrapper of yore into two potential links), so they wouldn't fit into each other (you have to be able to slide one into another, leaving room for another one to then slide into that one). I actually have a sneaking suspicion that the new wrappers aren't the right dimensions - I re-did them by making extra lengthwise folds to make the links more long-and-narrow so that they have room to link into each other, and the results weren't ideal.
 |
| Showing where the links interlock, before realizing my error. |
|
 |
| See? Something's off here... |
So, in conclusion, I'm kinda over this whole gum wrapper chain thing made of actual gum wrappers. Here are more shots of my non-wrapper gum wrapper bulletin board chains to compensate.
 |
| ...Aaah |
 |
| Oooh... |
However, if, for some reason, you still don't feel properly educated in
the art of the gum wrapper chain, feel free to check out Gary Duschl's
website (he's the guy who made the aforementioned record-breaking gum
wrapper chain). His instructions are super clear and he's super nice (he writes that you
should email him if you are struggling). So go, check it out, and soak
up the aura of a dying art.