Showing posts with label home improvement. Show all posts

Friday, April 20, 2018

Indoor Wireless Switch

Continuing my rental house theme this week, I want to talk about one of my absolute favorite products for making your home's electrical wiring work for you - without rewiring anything! Maybe you live in a rental like us, maybe your home was built before modern expectations of plentiful outlets and logically-placed light switches, or maybe you have realized a need recently that you left out of your home's original plans. This wireless switch is here to help!


Here's the gist: you plug the receiver end into any outlet (i.e. the one closest to the light you want to turn into a switch light), plug your light into the receiver, and mount the wireless light switch anywhere that's convenient for you (I like to use 3M strips). Boom. Insta-light-on-a-switch.

We've used these things in two apartments and a rental house (and I used them in a third apartment when I was single). Trust me, there is ALWAYS a use for these babies. As someone who hates harsh central lighting, our current house's setup wasn't ideal - every room has a built-in wall remote thing that controls the fan and its light instead of a light switch with a corresponding outlet. I've included a pic for reference. The green button is super hard to push, and when you do, you're rewarded with a too-bright overhead light flooding the room. Since we already have a small cache of wireless switches, we utilized them to create the following lighting situations:

- In our living room we've plugged two floor lamps into an extension cord that plugs into a wireless switch receiver. Then we mounted two corresponding switches near our back door and our staircase so we can easily flip on the lights when we enter from the garage (the most common way we enter the house) and flip off the lights as we head upstairs at night. In this scenario we needed two sets of switches, and, this is important, they HAVE to be the same frequency channel - something that you can't control when you order from Amazon. The switches and receivers have little stickers on the back that tell you what channel they're set to. I've heard rumors that you can fiddle with the switches and change the channel yourself, but the whole point of me ordering these things is to avoid any sort of electrical fiddling, so yeah... lol

- In our guest room we tucked a floor lamp in the far corner of the room and mounted the wireless wall switch next to the fan switch at the room's entrance. It makes for a much more welcoming room, and as you can see from review photos, the wireless wall switch blends nicely with other preexisting switches.

Helpful Info
Here's where you can get these switches. They've updated the model since I purchased ours (the ones we have look like the ones in the reviews).
- Currently $16.97 for one receiver and one switch.
- Comes ready for use.
- Like I mentioned earlier, each switch comes with its own frequency channel (such as D, E, F, maybe more). You can't control what Amazon sends you. So, if you only need one switch, no worries. If you're going for a more complicated setup like our living room, it might be worth it to try ordering these a few times (if you're someone who doesn't mind returning things to Amazon) to get a matching pair. We lucked out in the living room situation as we already had a matching pair on hand.

Always Helpful
     If you don't use the Honey browser extension tool, you should. Not only does it automatically search for coupon codes to apply to your order for thousands of online stores, it also alerts you to better deals on an Amazon product, as well as tracking the price of said product (so you know if now is a good time to buy!). It's free, it's easy, and you can get kickbacks like Honey Gold.

Disclaimer: As always, this isn't a sponsored post. I just really like this product and feel that it is my privilege and duty to share my personal opinion with you. :)

Monday, April 16, 2018

LED Motion Sensor Table Lamp / Night Light

We live in a rental house, which means we have limitations. I take this as a challenge. How can I make this house work for us? Awkward space between a separated double vanity? There's an IKEA bar cart for that. Flimsy closet doors falling off tracks? Take those suckers down and hang up a pair of curtains! (We've done this twice now - it's awesome to have easy access to your entire closet in one sweep!)

Shortly after we moved into our current house, I ran into a little problem with our upstairs landing/hallway. I wanted some sort of night light since it turns into a bit of a black hole at night, and since it's a spot guests have to walk through on their way from their bedroom to the bathroom, I knew some additional light was needed. Who wants to awkwardly shuffle-creep down an unfamiliar hallway for a 2am potty run? In case you're struggling to really visualize my problem, I've provided a helpful diagram below. Why yes, I used to be a teacher, why do you ask? :P


After countless searches for battery-powered electrical outlets (spoiler alert: they don't exist), I finally settled on a battery-powered nightlight. Yes, I do things the hard way sometimes. That's when I came across this little gem. It's cheap, it's small enough to fit on a little hall table, and it looks super modern and trendy. It very clearly comes from China (the instructions are hilariously bad), so I was dubious, but it's been six months, and it's still going strong! I like that it's motion-activated, so it really conserves battery power. It also has an automatic daylight sensor, again conserving batteries. It can be turned off and on manually as well if you want consistent light.

This item definitely falls into the category of cheap and easy home improvement fixes - it's worked great for what we needed, and I definitely recommend it!

Helpful Info
Here's where to buy this light. The link takes you directly to the "Round Orange White" option, which is the one I have.
- Currently $9.49
- Needs 3 AAA batteries (not included)
- Dimensions: stands 15.5cm tall, 7.5cm wide (this is a small light)
- The light has three modes: automatic (motion-sensor, with daylight shut-off), permanently on (steady light), and permanently off.

Always Helpful
     If you don't use the Honey browser extension tool, you should. Not only does it automatically search for coupon codes to apply to your order for thousands of online stores, it also alerts you to better deals on an Amazon product, as well as tracking the price of said product (so you know if now is a good time to buy!). It's free, it's easy, and you can get kickbacks like Honey Gold.

Disclaimer: As always, this isn't a sponsored post. I just really like this product and feel that it is my privilege and duty to share my personal opinion with you. :)

Friday, April 6, 2018

Bamboo Charcoal Air Purifier Bags

I had a problem. Well, two problems, but they were the same problem. So, one problem. And it was... stinkiness. Specifically, nasty diapers and a distinct elderly-person's-home odor. The first came from the general vicinity of my son's diaper pail (no matter how tight it auto-twisted those bags shut!), and the other came from an amazing yard sale score: a gorgeous cream, navy, and coral Mexican blanket for $1. ONE DOLLAR!!! Anyway, said blanket came home with me, lived in a box for a few months during our move, then emerged and graced our new guest room/office with its presence. And it's odor, as I found out a few days later.

I wanted something to eliminate the odor and not just cover it up. Sound familiar? Yeah, Febreze didn't cut it. And I can't really Febreze a plastic diaper pail. But, my Amazon hunting yielded these little treasures. Charcoal-filled bamboo bags meant to absorb odors. I hung one up behind the diaper pail (right at stinky bag-top level) and laid the other one on top of the folded blanket in the guest room. Days, or weeks, or maybe a month passed (#momlife), and I suddenly noticed that the odors were gone. These things work! One keeps the diaper stankiness to a minimum (there's no avoiding that blast when you open the lid to cram in just. one. more.) and the other sucked all the "mung bean" smell outta that beautiful blanket.

Helpful Info
Here's where to buy these awesome things.
- $6 for 2, $12 for 4 (ah, I see what they did there...)
- Recharge once a month by placing the bag in direct sunlight for an hour.
- Other suggested uses include shoes, the refrigerator, freezer, car, gym bag, purse (though that might be a bit awkward, right?), bathroom, closet, drawers, sporting equipment, and luggage.

Always Helpful
     If you don't use the Honey browser extension tool, you should. Not only does it automatically search for coupon codes to apply to your order for thousands of online stores, it also alerts you to better deals on an Amazon product, as well as tracking the price of said product (so you know if now is a good time to buy!). It's free, it's easy, and you can get kickbacks like Honey Gold.

Disclaimer: As always, this isn't a sponsored post. I just really like this product and feel that it is my privilege and duty to share my personal opinion with you. :)

Saturday, March 8, 2014

Remixed Boot Tray

One of my brother's Christmas gifts this year was a boot tray, a handy little thing that serves as a catch-all for sloppy, snowy, wet boots. Before this winter, I would have never thought I needed such an item, but thanks to the massive amount of snow/ice we've had these past few months, I've realized it was an imperative addition for my apartment entryway.

My Inspiration
While my brother's tray is nice, it's a bit of an eyesore - since my entryway is part of the same space as my living room (and kitchen), I wanted it to add to the décor of the room. I found this idea on Apartment Therapy and fell in love. The original poster used a LADIS lid from IKEA as her tray base, but unfortunately, IKEA no longer sells that type of container. I searched high and low during my last visit, only to be met with disappointment. *sigh* So, onto Plan B.


Once I confirmed that it
wasn't super-valuable, I
colored over it's original
gold eyes with a brown
Sharpie, turning them a nice
(and more updated) bronze.
I searched and searched for a suitable black plastic lid at various stores but kept striking out. I also perused trays, but those were often too expensive (the LADIS lid was $3.00) or too cute to be used to hold dirty boots (like this one, from IKEA). My mom also pointed out how small my available space was - opening my front door leaves an area of about 11" between door and wall. I had my work cut out for me. Enter Ohio Thrift, a locally-based thrift store chain that I recently discovered while visiting friends. Needing a little bit of a pick-me-up after dropping my mom off at the airport the other week, I found myself browsing the aisles, sizing up items and scavenging shelves. I had a good feeling, since during my last visit I scored this little fellow (right) for $1.99! In the midst of my wandering, I found a few contenders for my boot tray, but they were all discarded when I found a deeper black wooden tray for $2.99. I sized it up in the store but hung onto the receipt, just in case I needed to return it for another option later. Luckily, I didn't need to! I brought it home, cleaned it up, and filled it with four bags of black river rocks from Dollar Tree. End result? Awesome functionality.


My mini entryway - the door passes
right over the tray without catching.
Also, please note the mini snow shovel,
bag of kitty litter, and ice scraper.
My Version!
Yes, these shoes are props. ;)

Sunday, March 2, 2014

The Great Cover-Up

... with curtains! I realized that I never posted an update about my curtainless (but frosted!) living room windows, so, without further ado, ta-da!


 Don't get too excited - they're from Family Dollar. Or Dollar General. I had all these grand plans of making a window cornice, even finding this great tutorial... but, I hit a decorating wall (coupled with an onslaught of schoolwork - lesson-planning, grading, reading ahead, oh my!). So I wimped out and purchased a few light-colored curtains from the dollar store. Not the best quality, but they look pretty good up there, and they offer a nice neutral framing for the windows (as well as hiding the glaring holes left behind by the removal of whatever hardware had been there in the past). Because the windows are adjacent to each other, I opted for one long rod to thread both curtains on. Initially, it bowed in the middle (doh!), but I quickly solved that with a well-placed screw hook. It blends right in when the curtains are pulled together. WIN. Also, the top picture below shows more of the true color of the curtains - they are a light cream color (not yellow).


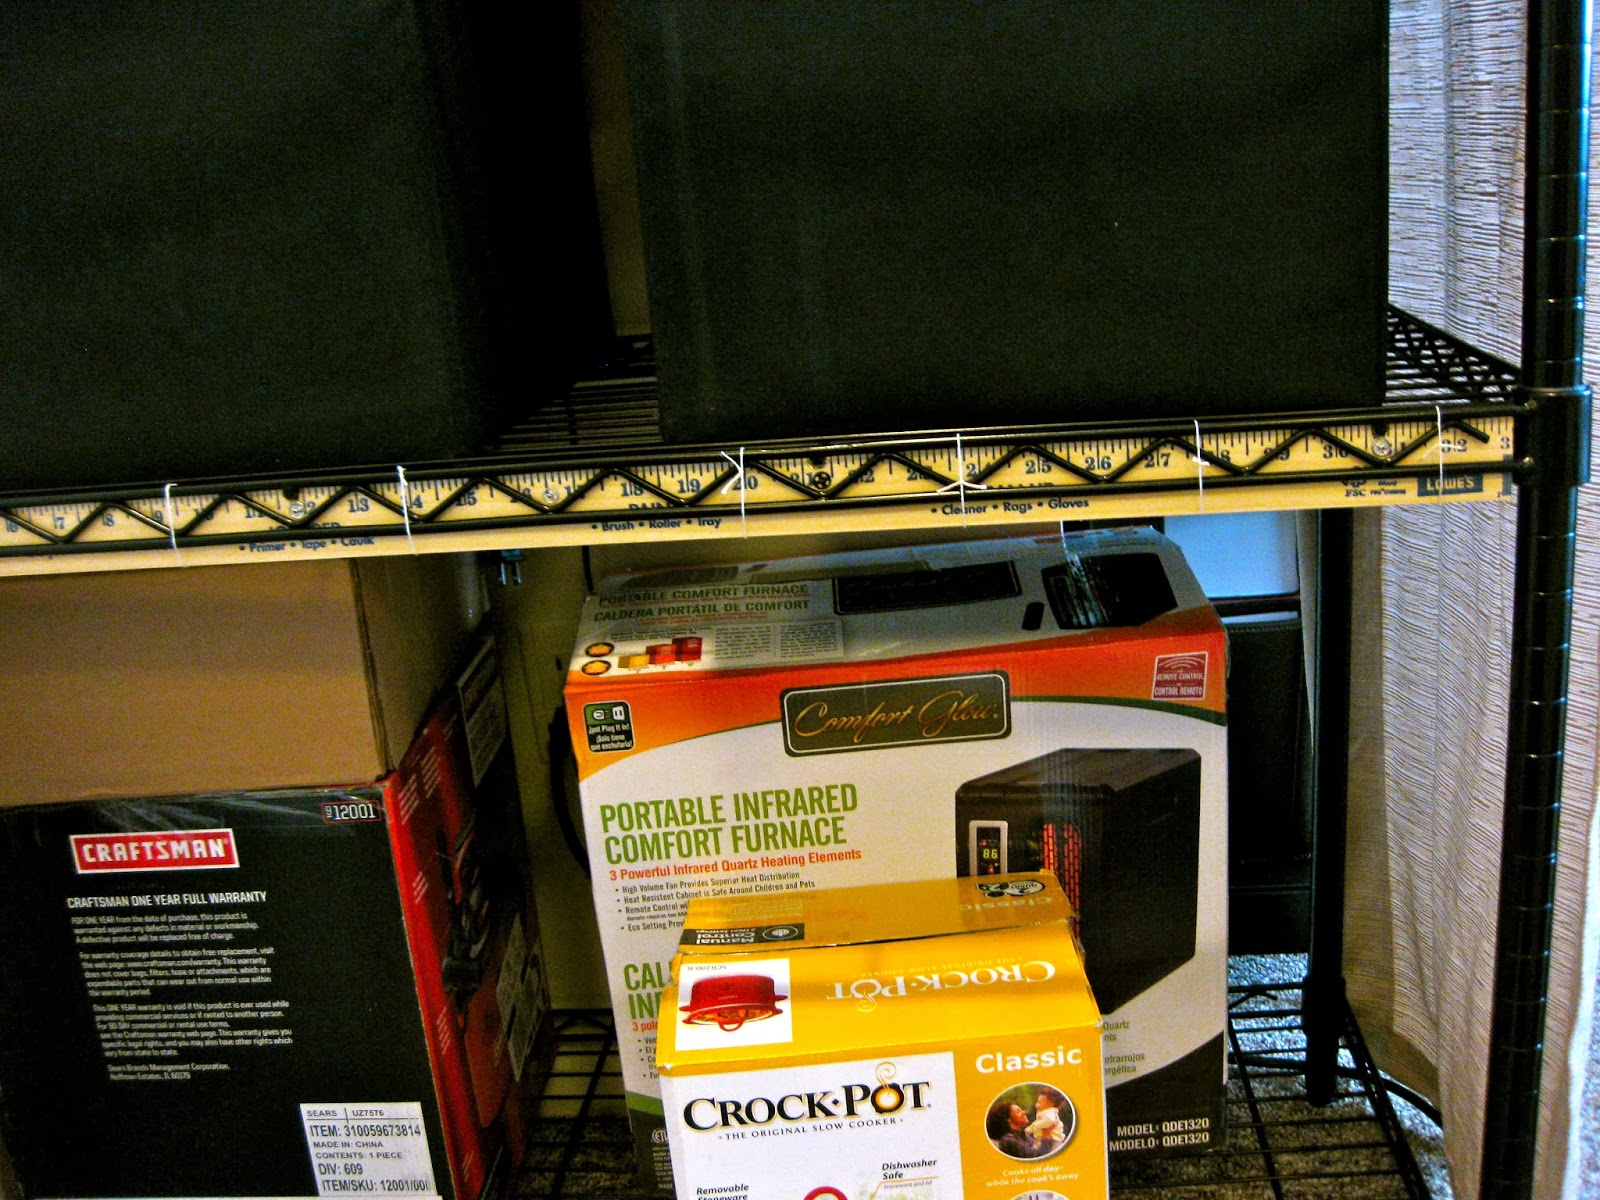
Another place that received a curtain upgrade was the wire shelving unit that I use as pantry/storage overflow (you might remember it from my original new apartment post). I purchased a window panel from the dollar store (high class around here, folks) and trimmed it down to size, using the hot-glue hemming method. I wanted the shelf to blend into the wall more, so I picked a neutral shade. To attach, I just split the hang-loops and tied them off on the top wire shelf. However, there was still a glaring problem:


Yeah, everything was just hanging out on the bottom rack (mostly empty boxes for storing items). Luckily, I had leftover fabric from the side curtain, but it wasn't enough for a single-paneled curtain of that size. So, I decided to make three smaller ones instead! Since I wanted a smoother look at the bottom, tying them off wasn't an option. So I devised a plan involving snaps, a yardstick, and felt.

Add caption
Add caption
After measuring, I drilled out a few notches in the yardstick to ensure a snug fit (there were wire rungs in the way of making it flush). After adhering snaps, I used twine to attach the yardstick to the shelf (zip-ties probably would have been better, in hindsight).


Then after some more measuring and cutting, gluing and the tiniest bit of sewing, I snapped my panels into place! Dontcha love how I gloss over the tedious parts? ;)

Snapping it on!

Two on, one to go!

Finished effect - looks more like pleats than separate curtains.
Also, they need ironing, I'm aware.

And, here you have it! The finished product! Much nicer, don't ya think?

Wednesday, September 25, 2013

Window Frosting FTW!

This past weekend I solved my privacy problem - and my plants-not-getting-enough-sunlight-because-I-keep-forgetting-to-open-the-blinds problem. I realized that roughly 95% of my awkward neighbor sightings were coming from the bottom halves of my living room windows, and that if I ever wanted to look outside, it was usually through the top halves. So, frosting the bottom panes was the perfect solution. Since I'm renting, I researched temporary options (read: no contact paper) that had some sort of self-adhesion. I bought some window film from Lowe's not too long ago for a different project (I didn't have enough leftover for this one) and I wasn't too thrilled to realize it wasn't adhesive - I had to create a solution and spray it on, then smooth out the film... it was a bit of a pain, and since this new project had a larger surface area, I knew I wanted to try something different.

My photo (for texture comparison)
Introducing... window film for the win!

Stock Photo
 
I found this peel and stick film from Wal-Mart (I shipped it site-to-store) that is adhesive, removable, and highly-rated. It also wasn't too bad price-wise, at $11 a roll. The texture was a little different than the picture appears - it's almost like circular thumbprints with ridges. But, it works like a charm. I've had it up for a few days, and I love it - it's thick, solidly attached, and lets in light during the day. One major problem I had was that I'd always close my blinds at night and since I get up SO EARLY that the stars are still out, I kept forgetting to open them in the morning. My poor plants were starting to droop. By keeping my blinds pulled up partway all the time, light can always come in.

My windows before (people walk right up the sidewalk to enter neighboring apartments).
In progress... SO MUCH BETTER.
Done! I leave the blinds halfway to guarantee light for my plants,
since I can't for the life of me remember to open my blinds every morning.

I know, I still need curtains of some sort - it's a work in progress! Stay tuned! :)

Friday, May 3, 2013

Repurposing IKEA Leftovers

This is an old project, and it's more resourceful than creative. Let's blame it on post-defense, pre-graduation weariness, shall we? To be fair, though, it IS about one of my proudest moments of handiness. You see, when my roomie and I were moving into our current apartment, we opted to fill in our furniture gaps with IKEA pieces (it helped that there's an IKEA less than 3 miles away). One such piece was a TV stand, a less-than-awesome picture of which is below:

This was taken pretty soon after we moved in, hence the empty picture frames and general sparsity. 

Well, as all IKEA shopper-builders know, when you buy something from IKEA that's a bit more complicated than, say, a mirror or rug, you have to buy it in separate parts - for the TV stand, that meant the stand/cabinet (I'm pretty sure it came with doors... but possibly not) and the plinth. Long story short, the roomie and I got a little turned around in the plinth aisle and grabbed the wrong size (because seriously, they all look the same in cardboard boxes). We realized this after we built the ENTIRE stand... so we went with it. Hence the little jut-out ledge at the bottom.

At the end of our IKEA build, we had a leftover piece of wood, which is usually not a good sign. We had attached the stand to the plinth and nixed what was originally the bottom of the stand, as it was unneeded. I still haven't figured out if the leftover plank was due to the fact that we had the wrong plinth or because adding a plinth is optional in the first place (you can do wheels instead). When I saw that extra piece of wood (which matched our living room) languishing away in my roomie's bedroom (it was really her TV stand, so it was her extra piece of wood), I came up with an idea.

Step One: Pester roomie to give me the piece of wood (super easy, because she didn't care).

Shelf Bracket
Step Two: Research brackets. Yes, brackets - we are building a shelf! My piece of wood was 33.25" by 14.25" and roughly 3/4" thick. After looking around and talking it over with my dad (handyman extraordinaire), I realized that I didn't really need anything fancy or expensive - I simply went to Lowe's and picked up a few of these babies. Since I was pretty sure I wasn't going to be using the shelf for anything heavier than mail, the 100lb capacity was plenty, and I liked their industrial look.

Step Three: Research wall anchors. I actually did this at the same time as my bracket research, since I knew that our apartment had hollow plastery walls that would need anchors. I honestly don't remember what kind I bought - I spoke with a worker at Lowe's after I picked out my brackets, and he helped me select the kind I needed, along with a few short screws to attach the brackets to my shelf.

Click to Enlarge
Step Four: Planning/sketching. I had to figure out where I wanted the shelf (centered) and how high. I then researched how to go about assembling my shelf (Do I attach the brackets to the wall or shelf first? Which end of the bracket attaches to the shelf - long or short?). There are all sorts of how-to's online - step-by-step articles (here's one on putting in wall anchors) and videos abound. Since I did this all around a year and a half ago, I'm a bit fuzzy on the details, but I simply followed the directions I found online that matched my situation (L-brackets, wooden shelf, hollow wall). The tools I used were a drill (I have a cute little Black & Decker one I picked up in Target awhile back), a rubber mallet, and a level, combined with the anchors, screws, and brackets I purchased.

Click to Enlarge
Once I had all my materials and had read/watched my how-to's, the project itself didn't take long at all - by the end of the afternoon, we had a new shelf for the landing strip area of our apartment. I still love it, it works really well to transition the living room into the dining room (which have different styles), and we use it all the time for mail and notes to each other. And guess how much this project cost, total? If you clicked on the wall brackets link (and saw how cheap they are!), you might have an idea already. It cost $6.52. Yup, six dollars and fifty-two cents (thanks, MD sales tax). Full disclosure, the vase and flowers I picked up at Michaels, I bought the clock from Big Lots, and the artwork is actually a framed postcard of a Sargent painting from the National Gallery of Art downtown. But, you get the picture - and now, scroll down for a few more of 'em!

Can you spot the owl pillow from a previous project? :)