Showing posts with label classroom. Show all posts

Sunday, December 7, 2014

Brave New World Bookmarks


At the end of each semester I give a little gift to my seniors (non-food, since that's illegal #ThanksMichelleObama). Since my seniors spend a lot of time outside of class reading an assigned novel (Frankenstein in the fall, Brave New World in the spring) and the last few weeks of class completing a multi-genre project on it, I’ve developed a tradition of giving them bookmarks made from the pages of their particular book. I’ve posted about this craft before, but I did something a little different this past spring.

The first steps were business as usual – pulling out pages from my chosen text and trimming them down to size (I always try to center the book’s title at the top).


However, Brave New World stymied me when it came time to choose an accent detail. Typically I’ve stamped a design of some sort on each bookmark, but I kept coming up empty with Brave New World. So, I decided to utilize the key icons of the book (Greek letters indicating castes) and replicate them on the bookmarks by hand… after looking them up to make sure I drew them correctly!

After making my ‘key,’ I selected a few colors and drew each letter in a variety of shades. Since I knew the higher castes would be more popular (duh!), I allocated them a larger number of bookmarks.


Once I had my bookmarks prepped, I ran ‘em through the laminator (my favorite thing to do!), cut ‘em out, and then used my nifty corner-rounder to finish 'em off. Tip: If you’re going to round corners, wait until after laminating – that way you only have to do it once. A good corner-rounder will punch through laminated paper just as well.


Lastly, I added a little sticker label to the back of each bookmark with references that encompassed the scope of the class (‘epic’ refers to Beowulf, the first text we read at the beginning of the semester). And, there you have it! Maybe not as neat as their stamped cousins, but my students didn’t know the difference. ;)

Friday, June 6, 2014

Scavenging for Gold(ing)

One of my sophomores' favorite activities this past year was a scavenger hunt that I planned in conjunction with The Lord of the Flies. Students were divided into groups and given lists of items that corresponded with Golding's novel.

Their lists read:
  • Something fair-colored for Ralph
  • A rock that reminds you of Roger
  • A leaf that reminds you of Simon
  • Something identical for Samneric
  • An item that reminds you of Piggy
  • Something sharp for Jack
  • An item that has a scar on it
  • An item that could be used to make fire
  • A "beastie" - no live things, please!
  • A flower to represent the island's beauty
We went outside during each period (even though it was a slightly chilly/overcast day - but no turning back!) and groups set off with their lists and brown paper bags (an easy way to moderate the size of the items they collected).

and flowers, oh my!
Rocks,

and sticks,


It was a lesson that definitely required some prep-and-planning time, but I'm sure it's one my students will remember. We all had a good time hearing different groups present their findings - there were some repeats, but even those provided good discussion points. I ended up taking pictures of what the groups collected and created a Powerpoint to share with them (different periods had different ideas, and one period missed the activity entirely due to a career fair... yup, thanks for the heads up, Office People... not). It was fun and a pseudo-review activity, as students sought to make sense of each group's item choices. Here are some of my faves:

Straw = Ralph's "Fair" Hair

Items for Piggy - The striped rock was "unique and different,
like Piggy" and the TruMoo milk has a... farm animal
connection, I think? Haha


All of the "sharp" things for Jack - thorns, a broken pencil, a nail,
some sort of metal stake, various sticks, a pointy rock, and a shard of plastic.
Leaves for Simon - a dead one (yeah, spoiler alert!) and an 'unlucky' and 'odd' three-leaf clover
that only has one leaf (they definitely plucked off the other two, lol)
All of their "beasties" - a few things that look like snakes, a 'caterpillar,' the bear on the Kodiak tin (*eye roll*),
and a few other items that had less-compelling rationales (one was literally described as "pea-pod thing").
My favorite items with scars. A lot of students ripped holes in leaves,
which made me wonder about their understanding of the term "scar." :P
The most ironic items - huge rocks that represented either Roger (rock) or Piggy (huge).
Get the irony? Get it? Major bonus points if so! :)

After the groups presented (and left for the day) I threw away most of the items (so many dead flowers and leaves!) and had a few students return the large rocks to their natural habitats, so I was glad for the photos. It was definitely a fun, creative activity that I hope made my sophomores' LOTF experience the slightest bit more enjoyable. ;)

Saturday, January 18, 2014

3D Letters, in Technicolor!


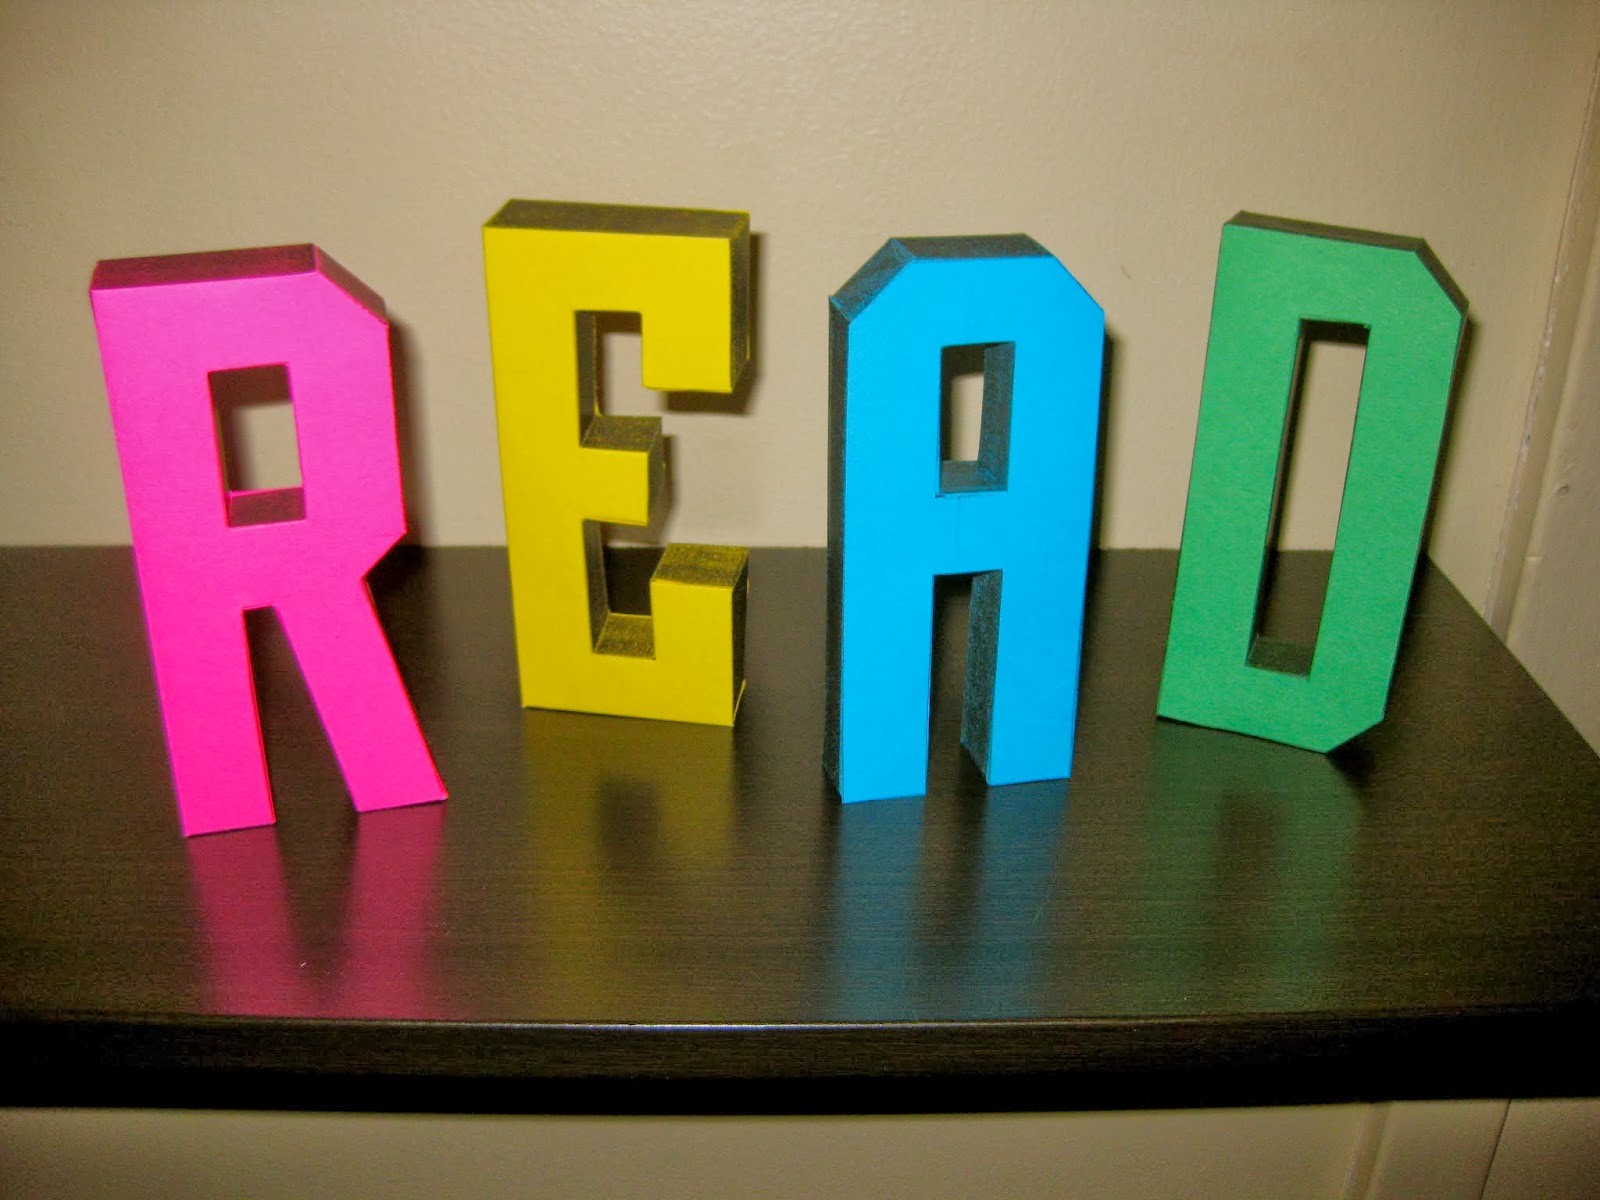
One of the craft blogs I follow recently shared a link for printable 3D letters (check them out over on Mr Printables!). I thought about what I could do with them, and decided to print out the letters R-E-A-D on brightly colored cardstock for use in my classroom. Printing them on cardstock made the trimming and folding a little difficult, but it wasn't too bad and gave them durability. I also slipped magnets into the bottom of the letters for added steadiness (and I had originally planned to place them on the top of a metal bookcase).


I made my letters over the course of a few evenings, which is the approach I'd probably recommend to anyone interested. It's an exercise in patience and detail, all that slicing and folding and gluing and taping (at least the way I did it!). I found the best combo to be using craft glue on the tabs, with a piece of Scotch tape layered over top (but out of sight on the interior of the letter, if that makes sense). I found that tape held faster, but the glue kept the sides together snug and tight. I also found that I needed time for the magnet-gluing to set, so I left them overnight and finished their assembly the following evening, let them then dry overnight with remotes on them for good measure. :P


I think they came out really nice - a few of my students noticed them and were duly impressed. I decided to display them on my counter, so that they were more visible. They got sort of lost on the bookshelf (you can see more of my classroom, including the bookshelves, here). They look pretty sweet up there, next to my IKEA score from last year's post-Christmas sales. :) [Note: The photos below were taken with my phone, hence the less-than-awesome quality!]


Friday, December 13, 2013

Found Poems

One weekend last month my mom sent me this pin on Pinterest that she thought I'd like. Well, I didn't like it... I loved it! I immediately set about incorporating it into my lesson plans. My seniors had recently finished up a unit on Romanticism, and while they were slightly burned out reading and analyzing poems, I figured they would still be up for writing some. Or finding them!

"Seek reason for being,
explain the necessity of time."
I began with a brief PowerPoint introducing my students to the concept of found poetry. Found poetry is "a type of poetry created by taking words, phrases, and sometimes whole passages from other sources and reframing them as poetry by making changes in spacing and lines, or by adding or deleting text, thus imparting new meaning" (source: Wikipedia). I showed my students examples such as Jonathan Safran Foer's Tree of Codes, Ronald Johnson's Radi Os, Tom Phillips' A Humument, and Jen Bervin's Nets for inspiration. Once they started to see what it looked like (complete with a step-by-step guide I had created the day before, composing my own found poem in the process), they were ready to set to work! Luckily, I ALWAYS have book pages on hand for crafting, so I simply passed out pages at random and set them loose!

Before I show the finished results, here's the step-by-step process I gave my seniors to guide them:

Step One: Look at your page of prose – do any words stand out to you?


Step Two: Trace a logical path through the text with your words – a theme will emerge along the way.
 

Step Three: Treat the rest of the page in a way that emphasizes your “found poem.”

...BUBBLED!
Bubbling...
...Bubbling...

 So yeah, pretty cool, huh? After passing out the pages, they all settled in to work, and I was so pleased with what they came up with! Check 'em out!


(Click to Enlarge)

He was the only one to
try this technique - and
he worked meticulously!
A nonsensical poem,
sparked by the discovery
of the word "bear."
A few students opted to
incorporate visuals to go
along with their poems.

 
There was such a variety of techniques and color schemes that they employed!


And no, they weren't just "pretty" - check out how profound my students turned out to be! ;) 

"Philosophy is reckoned by me."
"God created worlds, planets and comets, found in immense
spaces and all qualities observable."


"Failed writings remain unknown..."


"The body remarkable
but judged by the lives of many."


"The great demonstrations of a Perfect Being,
the existence of God."


I was so proud, I HAD to display them after I laminated them  (probably one of my favorite aspects of working in a school - access to a laminator!!). Using the wall space between my room and my teacher-neighbor's, I created a "Found Poems" display. These pics only show my students' work (the ones who wanted their poems displayed) - my colleague followed suit the next week, adding her students' poems to the display. It has garnered lots of attention these past few weeks, which is AWESOME. :) Highly recommend.


Sunday, October 20, 2013

Cheap and Easy Whiteboards

Whew, this week was looooooooooong. End of the first quarter came on a Wednesday, with no inservice/professional development day. Fellow teachers, you can appreciate the exhaustion I'm still feeling. Since this was my first quarter at my current school, I used it as a chance to feel out my students and the general school atmosphere... and I realized that absences and makeup work are major issues.

It's a well-known fact that absences are a major contributing figure to students' overall grades, but for me as a teacher, they have been causing a bit of chaos in my daily schedule. Students would stroll in at the beginning of the period and ask, "So, what'd I miss yesterday?" Often I'd look at them blankly and be like, "I just taught seniors about Macbeth for an hour and a half, and I'm trying to switch tracks to sophomore English - there was school yesterday?" Looking backwards whilst moving forwards in the moment is a bit difficult and time-wasting, since the rest of the students are ready to start class. Also - the rhetoric in the student statement above insinuates that it is my, the teacher's, responsibility to catch them up on their missed work. There are waaaaay too many students and waaaaaay too many absences (I had five students out from a single class period on Friday!) for that to be realistic. And the fact that I teach high schoolers should also weigh in here. So, in the spirit of a new quarter, I have made a few changes (students received copies of my new late work policy already!).

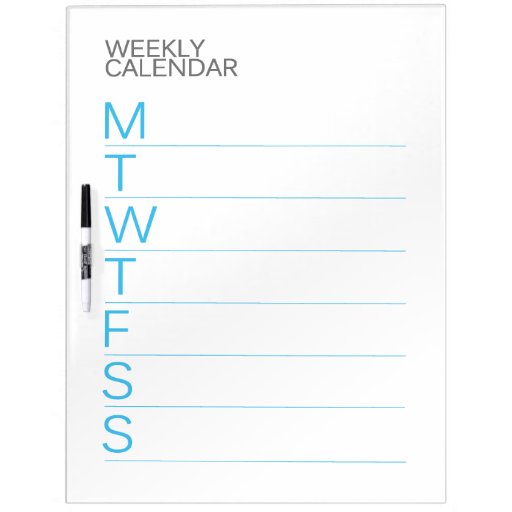
One idea I had was hanging a whiteboard in the back of my classroom where I could either record or have a student record our daily activities (we're talking quick jots here) so that I can simply send students there to look and collect their missing work (I have an extra desk and trays standing at the ready!). I started looking around for a weekly whiteboard that was nice and big for my plan, and I discovered that wow, whiteboards are pricy! And most are smaller than I wanted. So, on to DIY!

While Googling, I came across this post that contained the awesome idea to use panelboard as whiteboards (there are tons of suggestions online for various materials, but panelboard is cheap and easily obtainable). I followed the author's suggestions and went to Lowe's this weekend on the hunt for panelboard. I found sheets of 48" by 32" for roughly $11 - score! I plucked out a sheet, then found the wood-cutting area and had the guys at Lowe's saw it in half lengthwise. It was my first time doing this sort of thing, and it was pretty empowering, let me tell you. ;)

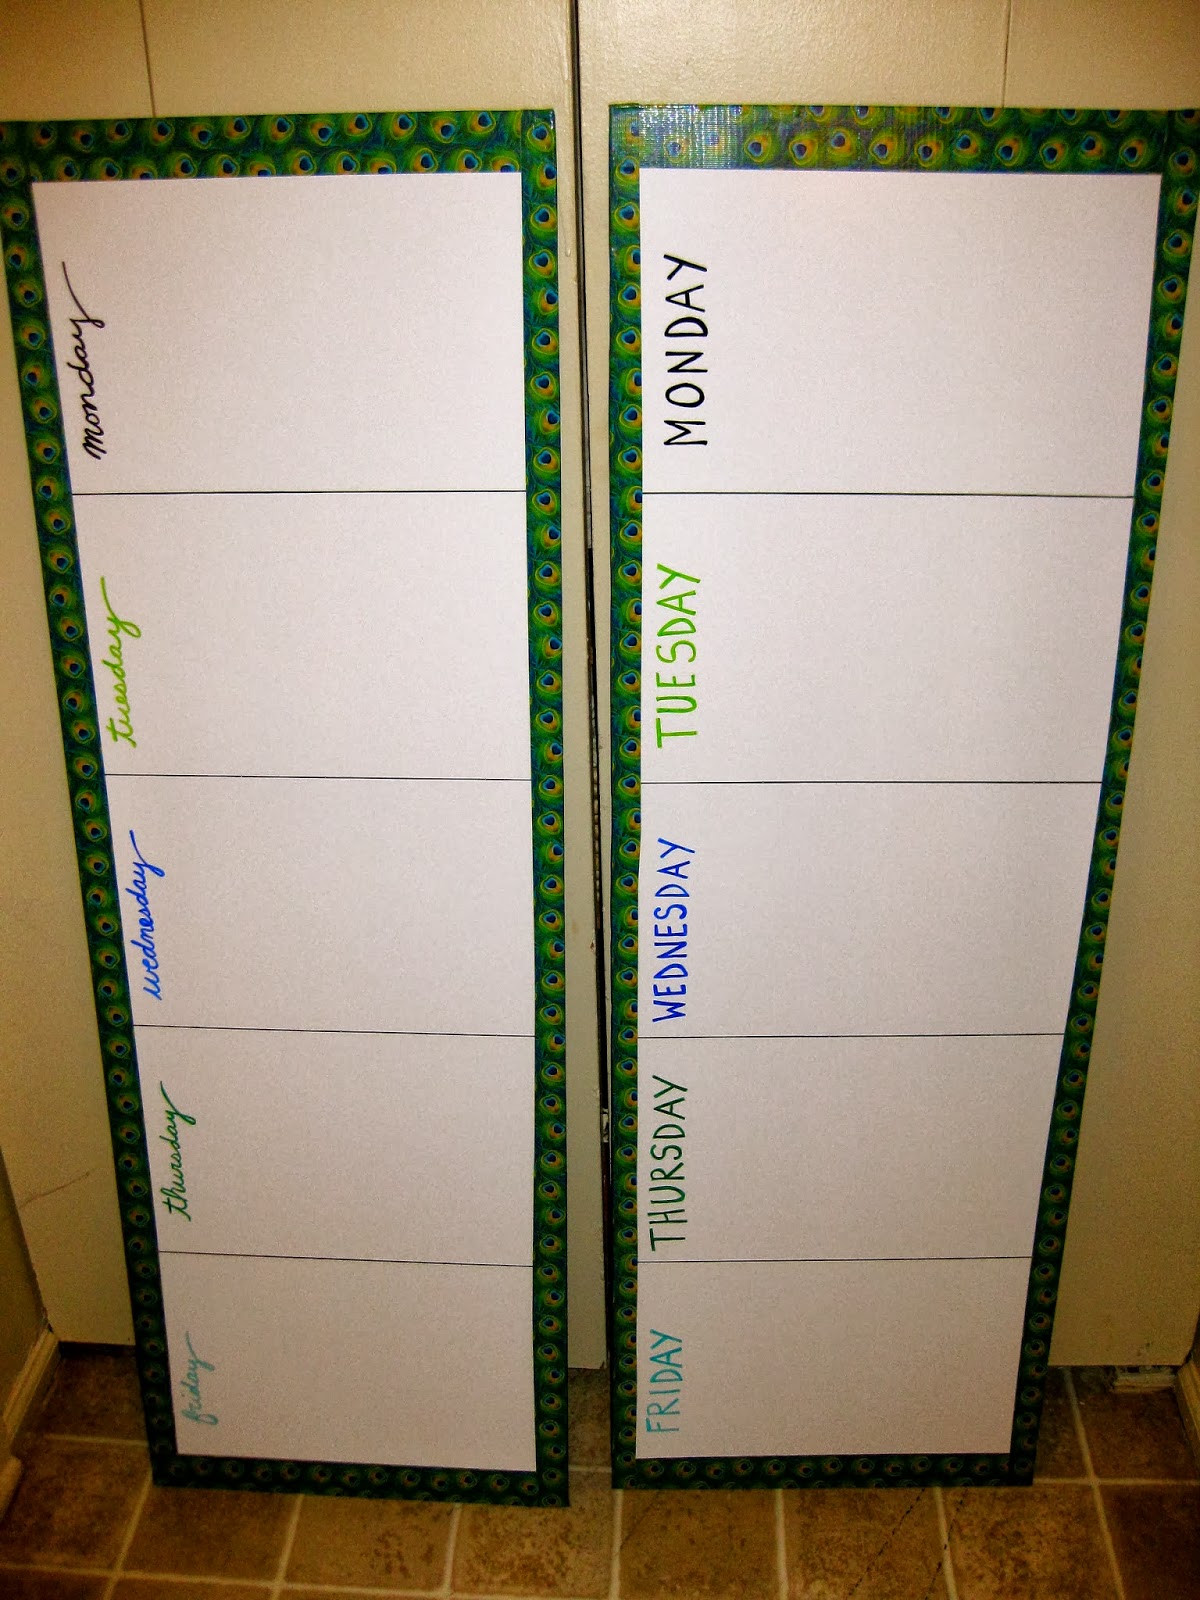
Each piece measures roughly 4' by 1.5'
Pleased with my new pieces, I brought 'em home, cleaned 'em up, and set about making them into my weekly work boards. Apologies in advance - my night-crafting habits have once again resulted in poor pictures.

I measured out five equal sections and lined them with Sharpie so that I could erase without fear of messing up the board. I felt pretty confident, since I had already double-checked on whether or not you can erase permanent marker from whiteboards (there are a variety of ways) so my bases were covered.

To make it easier on myself, I divvied up the remaining 3" into border space, so my 5 sections were equal.

Matted, Marked, Delivered!
After measuring and marking out the sections, I rummaged around my on-hand materials for an idea for a border (panelboard is unfinished, and like the author warns in her post, the board often splinters a bit at the edges when cut using the store's saw, since it's not made for this material). I found some leftover patterned duct tape that I had used previously to mark out my apartment number on my curbside trash can (you can ALWAYS incorporate flair), which I thought would work perfectly. I had just enough to frame out the boards... though I admit the job is a bit imperfect. However, I seriously doubt my students will mind/notice, and I'm pleased with the look.
 
It was easier to thicken the letters from the bottom!


 After I did that twice, I had my two boards! But, they were missing one final thing - weekday labels! So I dug out my colored Sharpies and set to work. I chose colors that matched the border design and varied my fonts to help differentiate the boards for my two grade levels. They came out so nice, I think they'll help ease the annoyance of having to track so many absences/makeup work. :P Here are a few shots of the finished products!


And here they are in their new home! Together with the trays for makeup work, I think they will really help me (and my students) stay on top of missing work. When students come in after an absence (a daily occurrence), I can send them to the back and say, "Look at the board and your period's tray." Zero excuses, little students. Zero excuses. ;)


 It's much easier for me to toss in makeup papers per period than return to the task later. Also, since the trays are in the back of the room, I can simply add the number of makeup papers with the papers I'm passing out to that row already and have a student place them in the appropriate tray. I also am thinking of asking different students to record the day's activities at the end of the period (one less thing for me to do!) - thanks for the idea, Mom!