Showing posts with label food. Show all posts

Sunday, October 12, 2014

(Easy) Pumpkin Cinnamon Cupcakes

My mom sent me a recipe for pumpkin cinnamon cupcakes the other week, and I thought it looked pretty easy and tasty (my two main baking/cooking prerequisites!). I gathered ingredients and whipped up a batch, which proved to yield 30+ cupcakes! I brought a dozen into work for my coworkers on Oct. 8 (awesome coincidence, since I had no idea this day existed). They were a big hit, and two colleagues asked for the recipe, so I thought I'd share it below! I was also able to use these ADORABLE owl cupcake toppers that I'd picked up at Wal-Mart a few falls ago, so it would have been a major win no matter what. ;)

 Ok, the recipe - are you ready? Here it is! Click the links for each ingredient to see the specific variety I used (due to personal preference and/or availability).

Ingredients:
 Directions:
  •  Prepare cake batter as directed on box. 
  • Add in can of pumpkin.
  • Mix in bag of cinnamon chips.
  • Bake as directed on box (I added a few minutes, since the batter was so wet and my oven is older and doesn't run very hot).
  • Frost cooled cupcakes with icing. 
  • Literally, that's it. So. Easy.
My finished cupcakes were really moist and flavorful. Not sure if they would be as moist with a different batter as a base - I'll probably try a different one the next time I bake these, just out of curiosity. Hope you get a chance to try this recipe for yourself! :)

Tuesday, June 17, 2014

Sweet Treats: Miniature Turtles

Has anyone ever tried to make the little snacks that consist of a pretzel, a Hershey kiss, and an M&M? Has it failed miserably for you? Me, too. And, you're not alone. I have the worst luck with making that (seemingly) simple treat - the kisses never melt right for me. A friend once told me that the chemical makeup of Hershey kisses causes them to harden if you bake them too long, which is exactly what happened as I kept baking mine longer and longer in an attempt to reach the 'shiny, semi-melted' state. I never achieved that state.

However, there is a MUCH easier, and in my opinion, MUCH better variation out there - the miniature turtle. While they are a bit pricier (due to the pecans), it's worth it. When you end up throwing away what is roughly the equivalent of an entire bag of Hershey kisses in the wake of failure, shelling out a bit more for pecans ain't so bad. ;)

Recipe (adapted from the Rolo site):

Small pretzels (I used Butter Snaps, because I can never find the wagon-wheel types)
1 bag of Rolos (this is usually the basis for how many treats I make)
Pecan halves

Heat oven to 350°F. Lay out pretzels on a baking sheet covered with parchment paper (Kroger makes these awesome pre-cut sheets). Top each pretzel with an unwrapped Rolo. Bake 3-5 minutes until the Rolos begin to soften - remove from oven and press a pecan half onto each Rolo while they are still warm. Cool completely (at room temperature or in fridge)... or eat 'em while they're still warm!


These are super easy and, so far, foolproof. I whipped up a batch of these for my coworkers at the end of the school year since I'd been lagging in the department potlucks we'd had (forgot about one, brought juice to another). After letting my mini turtles chill in the fridge overnight, I loaded them into a fun container and left them in the teacher's lounge for everyone to enjoy. I opted for a reference to Aesop's fable rather than making a comment on how slowly the year crawled by. ;)

Friday, December 13, 2013

Handy Halloween Treats

Yikes, this is overdue, but I wanted to put it up now - better late than never, right? These are some handy treats I whipped up for my colleagues right before Halloween this year. The ingredients are simple: clear plastic disposable gloves, popcorn, and candy corn! I wish I could remember where I first saw this idea, but it's been years. I think it was a magazine. At any rate, the process is so easy - the hardest thing is probably tying off the bags once their full, since you tend to have slippery fingers (from the buttery popcorn!). Just drop a piece of candy corn in each finger, then fill the glove with popcorn - you made need to work it a little to fill out each finger. Then tie it off with a twist-tie - I slipped notes on mine as well. Fun, cute, and easy! :)

Saturday, September 14, 2013

Sweet Treats: Acorn Cookies

A few weeks ago I saw a recipe on Facebook for acorn cookies using Hershey's Kisses, mini Nilla Wafers, and butterscotch chips. I was a bit skeptical because A) FB/Pinterest recipes are notoriously spotty (some flat-out lie - take a look) and B) I'd already struck out trying to find chocolate Nilla Wafers for the chocolate mice I made for my birthday party, so I figured finding mini Nilla Wafers would prove equally futile. I made my skepticism known and moved on. However, the very next time I went grocery shopping, I stumbled on a plethora of mini Nilla Wafers! I had been dead wrong in my scoffing. Of course, this meant I had to try out the recipe. I made a few tweaks (switching out butterscotch chips for peanut butter ones and using chocolate frosting instead of decorator's icing), and they still came out just like the picture promised! I stand corrected, FB recipes. But I remain wary. Pinterest Fail has taught me that much. ;)

It's impossible to hide the icing - but my coworkers didn't seem to mind
(I left a container of 20+ in the teacher's lounge... they were gone by 2pm!).

Saturday, July 13, 2013

A Sweet and Simple Fourth

I know, I know, the Fourth of July was a week and a half ago, but moving at the end of June and beginning my summer job this past week have kept me so busy, it's ridiculous. And add to that an unplanned (and yet hopeful, in terms of job-seeking!) overnight trip to Ohio this weekend. Whew. But anyway, back to the Fourth. I just wanted to share a quick (and VERY easy) dessert treat that we made, along with our decorations from this year and last (some of which we recycled for this year!). The dessert comes courtesy of my friend Beth, who gave me the idea the week before. Ready?

Step One: Follow the instructions on a cookie mix for sugar cookies (or you can whip the dough up from scratch, if you're that sort of person).

Step Two: Take your dough and spread it on a pizza pan like a crust. We lined our pan with parchment paper for easy non-stick serving. Bake your super-huge cookie until it's that lovely shade of golden-brown. We just eyed ours until we could tell it was ready, but I bet you could find a more specific time limit online.

Step Three: Once your cookie crust is cool, layer on the Cool Whip! We didn't use entire tub, if I remember correctly - just spread it on until you have a nice thick covering.

Step Four: Select and arrange your fruit! My friend's version had blueberries, strawberries, kiwis, and possibly more - we stuck to the red, white, and blue holiday colors, so we used blueberries and strawberries. Starting with the strawberries, I just laid out a circular pattern, eventually adding blueberries in the open spaces.

Step Five: Cut and serve! It's so simple, but it's really delicious and versatile. And it has fresh fruit on it, so it can't be THAT bad for you, right? ;)

Mmmmmmmmm.....

Click to Enlarge
As for decorations, we had a pretty simple spread, since our Fourth was a low-key affair (I think we were still recuperating from my move!). We did use paper straws, which are an easy way to festivize any meal. My mom also does this cup-layering trick to dress up plain plastic cups (which she prefers since they are larger than typical paper cups), so that helped as well. We also pulled out some past decorations, like the balloon-weight-turned-centerpiece from Memorial Day and the paper burlap banner from last year.

Click to Enlarge
Click to Enlarge

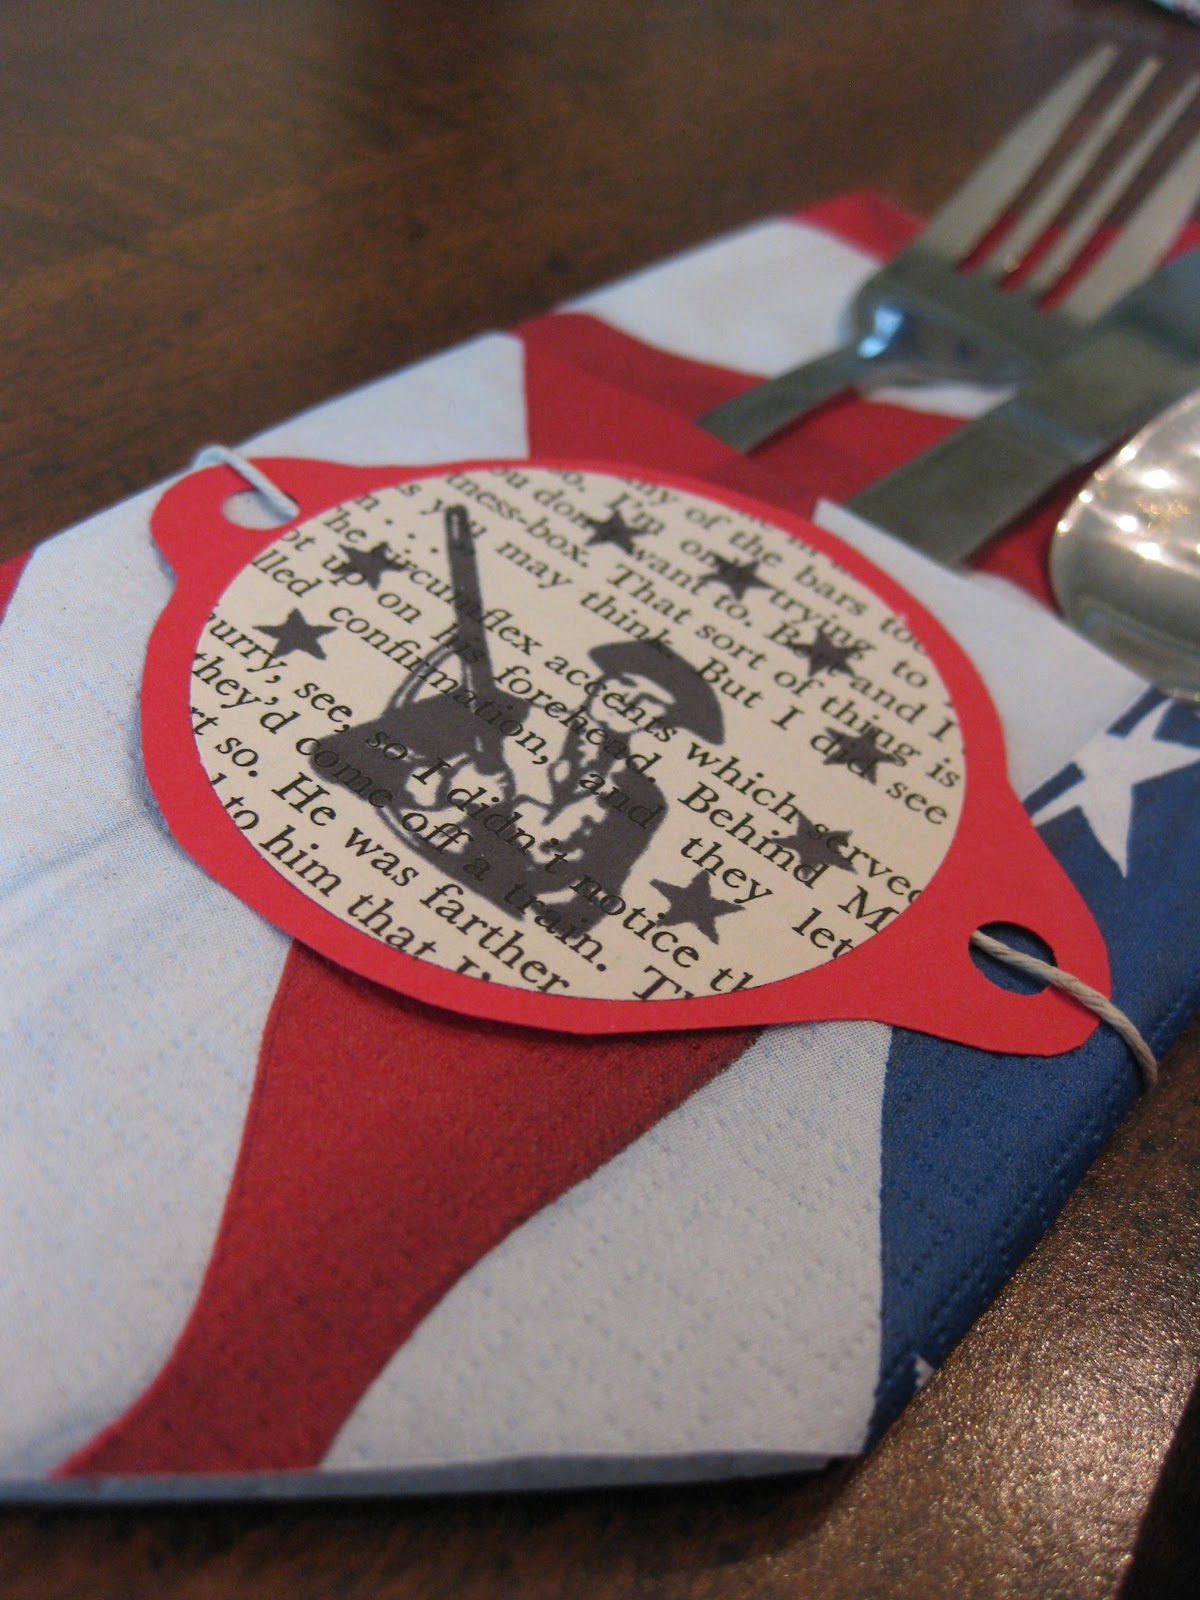
Something we did last year, but not this time around, was use a decorating method that eventually became the basis for my Testudo treat-toppers from this past May. We ran old book pages through our home printer to digitally "stamp" images and text on them. We used clip art and text in Microsoft Word to create our designs (both are mashups, actually). Check them out!

Spinner decoration (with the same design on both sides)
Silverware/napkin adornment


I'd like to note that I traced the words "happy fourth!" on the spinner with a Sharpie marker so they would stand out more sharply. We also made a few festive pinwheels, which we tucked into an embellished Mason jar to sit on the table - we didn't save them, since they are so easy to whip up, and less easy to store without crushing. You can find an easy tutorial here.


Hope everyone had a Happy Fourth!

Friday, June 21, 2013

Cirque Snacks

All the food at "A Night at Le Cirque des Rêves" was black (read: chocolate), white, and/or red. We had strawberries, chocolate and strawberry Twizzlers, chips and salsa, and more! I also tried out a few Pinterest-inspired treat ideas (specifically chocolate mice, cupcakes with toppers, molded sugar cubes, and some popcorn and animal crackers movie snacks) for the party, which I'll detail below. 

Party Treat #1: Chocolate Mice 


As he continues to walk around the circus, Bailey’s path leads back to the courtyard. He stops briefly to watch the sparkling bonfire and then at a vendor to purchase a bag of chocolates to make up for his mostly uneaten dinner. The chocolates are shaped like mice, with almond ears and licorice tails. He eats two immediately and puts the rest of the bag in the pocket of his coat, hoping they will not melt.


Some of the best food items mentioned in The Night Circus are the chocolate mice, and there are all sorts of recipes for making your own. The one I used results in more of a cookie, and it's originally a Christmas recipe, but judge for yourselves how awesome the finished results are!

Here's the recipe:
  • 2/3 cup semisweet chocolate chips (I thought about subbing in milk chocolate, but chickened out, not wanting the project to become a Pinterest fail - next time I'll definitely pull a switcheroo, since I prefer milk chocolate to semisweet)
  • 2 cups chocolate wafer crumbs, divided (I originally wanted chocolate Nilla wafers, but I couldn't find them anywhere, so instead I used Oreo cookies, scraped free of icing)
  • 1/3 cup sour cream 
  • 1/4 cup sliced almonds 
  • 18 pieces black shoestring licorice (2 inches each) (I actually found this at Target in the cake-decorating section, but Walmart has it, too - it was pricier than I wanted, but I'm glad I caved - the little tails MADE the mice, seriously)
  • 36 red nonpareils (I opted to leave these out)
Step One: In a microwave, melt chocolate chips; stir until smooth. Stir in 1 cup crumbs and sour cream. Cover and refrigerate for 1 hour or until easy to handle.
Step Two: For each mouse, roll about 1 tablespoon chocolate mixture into a ball, tapering one end to resemble a mouse. Roll in remaining chocolate crumbs to coat. Position almond slices for ears and licorice pieces for tails. Yield: 1-1/2 dozen.

The process was as easy as it seems, and the mice were a hit. Because I wasn't sure if 18 mice would be enough, I increased the recipe to yield more (I think I halved it and added that to the total, yielding 27-28, if that makes sense). Anyway, I didn't have a single chocolate mouse leftover. Yup, they were all gobbled up!

Ready to decorate!


All the scraped-out Oreo icing!


Awwwwww.

I nestled the little chocolate mice in extra baking cups I had after making cupcakes - that way I could avoid another large serving platter and they were mess-free to serve.

Party Treat #2: Cupcakes with Silhouette Toppers

Source: etsy.com via caritasity on Pinterest
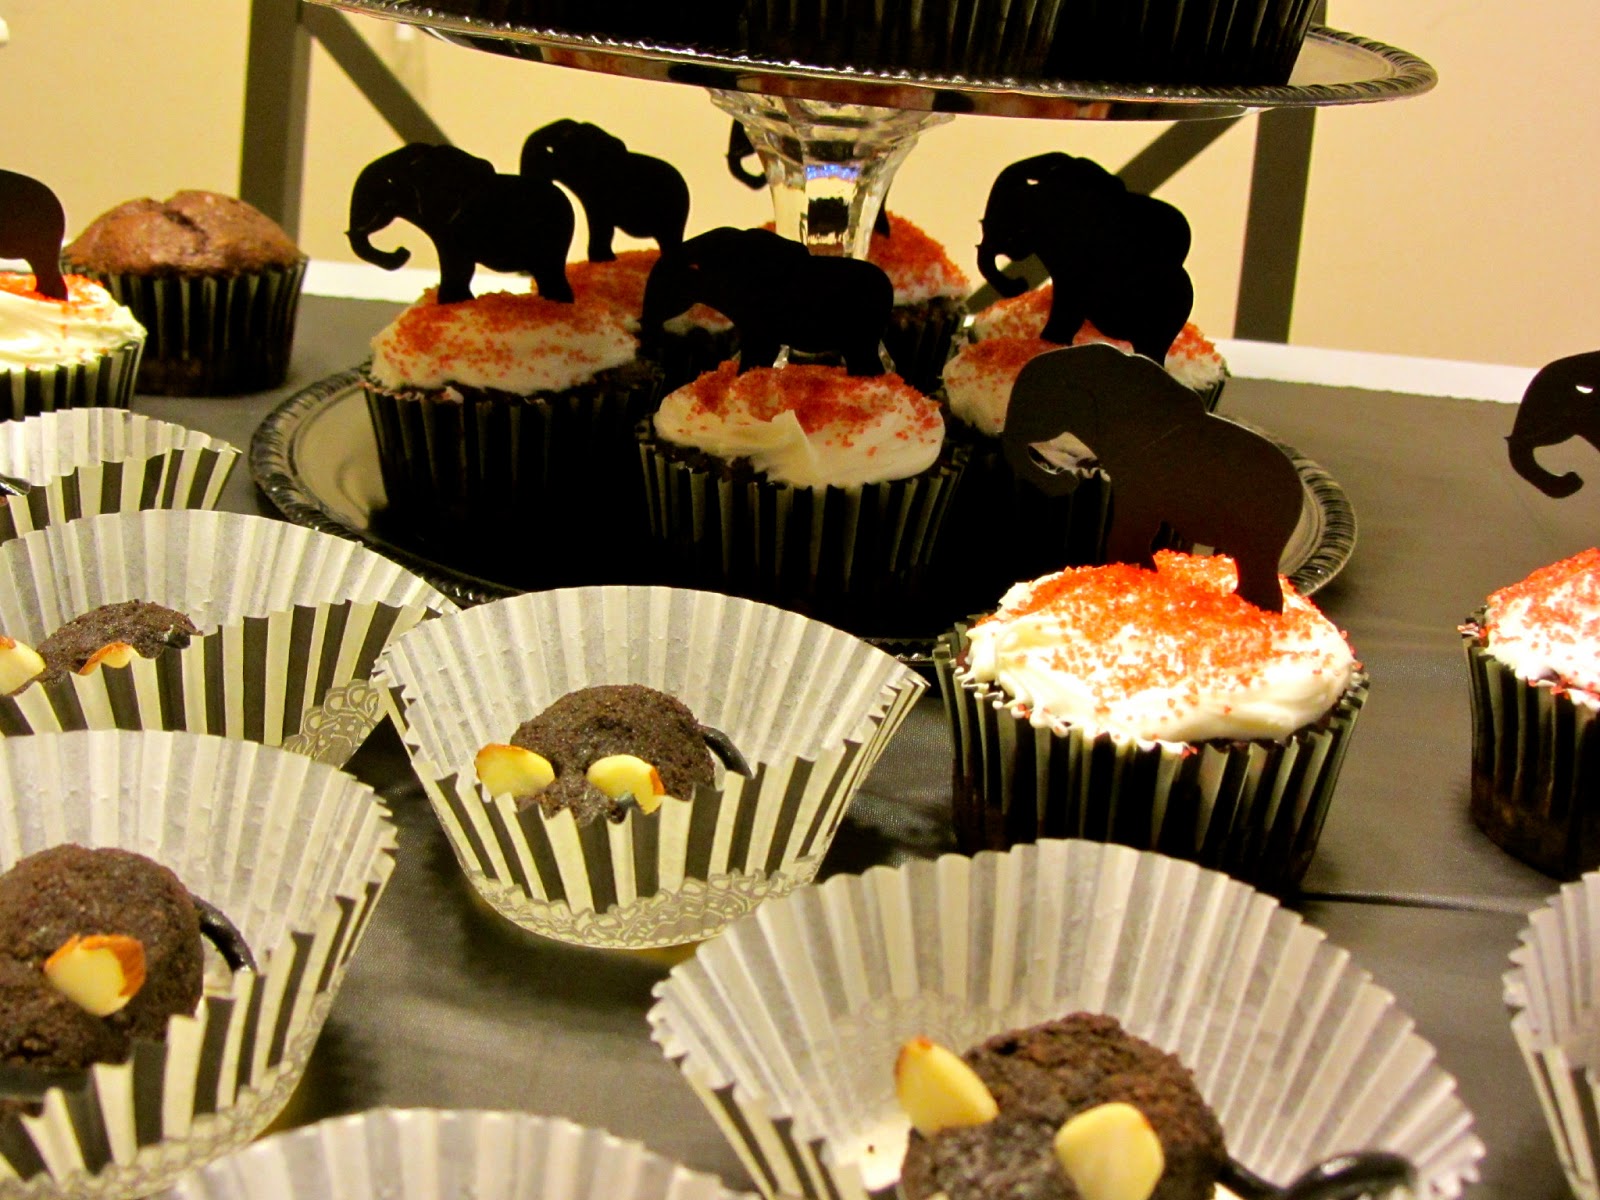
After I pinned this idea of silhouette cupcake toppers on my then-private planning board, my mom informed me that her Cricut machine did indeed have an elephant pattern! I decided to use black cardstock, which turned out nicely. And I discovered black-and-white striped baking cups in a Michaels deals section for only $1.50! After buying some red crystal sprinkles, I was ready to whip up some themed cupcakes! Since my party was at my brother's house (which is located on the other side of D.C., a 40-minute drive away), I elected to ice the cupcakes there. It made my drive over a little less stressful, and I was able to enlist my friend Kathryn's help!

Ready to travel!
I made a full two-dozen cupcakes


Rushing to finish!


The chocolate mice and cupcakes on display!


Detail shot of yummy finished cupcake!
Putting my Dollar Tree tiered tray to use!


Party Treat #3: Molded Sugar Cubes 

Another idea I saw that I wanted to try out was molded sugar - the recipe seemed simple enough: take sugar, add water until the mixture is the consistency of wet sand, then press into mold. While the original inspiration (at left) had skull-shaped cubes, I didn't think they were quite on theme for "A Night at Le Cirque des Rêves." However, during one of my thrift store visits, I found the PERFECT ice tray to use - this star cubes tray from IKEA! It had a deeper setting than the skull tray, so my resulting sugar cubes were somewhat larger.

While the process was simple enough, I still learned a few tips and tricks to this project, which I'd like to share:

Tip #1: When using irregular molds for your sugar cubes (i.e. a star shape with multiple narrow, sharp angles), it's best to create a custom presser to pack the sugar in (see pics below). Your finger is just not the tool needed here.
Tip #2: Speaking of fingers, sugar particles are a lot like sand, meaning they are scratchy. I was surprised to find little cuts and roughed up cuticles on my fingers in the days following the party, and I've concluded that it had to have been the sugar (I mixed the water and sugar together by hand, scrunching the mixture the way one does wet sand). Strange side effect, but one to be wary of nevertheless!
Tip #3: Leftover sugar cubes can be used in your morning coffee! Since the cubes turned out to be a bit on the larger side, a few party-goers abstained - and I had made plenty to go around!

My little custom presser made from cardboard and duct tape!
A perfect-enough fit!
Filled tray, with some leftover water/sugar mixture in the bowl.
Finished products! I loved how sharply defined they were - I let them dry and harden overnight before packing them up.

Party Treats #4 and #5: Animal Cracker Snack Bags and Popcorn Cups 

As part of the fun, I Netflixed The Greatest Show on Earth, a circus movie from 1952 (it had Charlton Heston in it!). To be honest, we didn't really follow the storyline too well, and it was super long, so no one braved it to the end (we started it a little late in the evening). But, it had awesome scenes of real circus performers from the 50's, which we all enjoyed!


To accompany the movie, I made these:

Circus Animal Crackers! (I found the fabric at Hobby Lobby)
I got the idea on Pinterest, of course! I found the clipart online through Google Image Search, and I printed it out onto sticker paper. I paired the stickers with black cardstock and baker's twine to create my bag toppers, and I used pretzel bags for a unique shape. Use whatever bag you purchase as a template for the width of your toppers - and be sure to leave room for the staples (both on the topper and in regards to filling the bag with treats)!

Supplies at the ready!
I wrapped the baker's twine around the front, then taped it down
The sticker hides the tape
See?


To give a sense of how many animal crackers I used -
these were the leftovers after making 25 snack bags
After filling the bag with animal crackers, I
attached the topper using a stapler, much the
same as I did with my Testudo Treats


I stored them in Ziploc bags to keep them from getting stale

I also made popcorn cups to accompany the bags - but I didn't get any pictures of those! So, I'll fill in with my inspiration pic (top left corner image):


And the images of my materials:

My themed popcorn of choice ;)
Black Paper Cups


 I created a label for the cups using the following elements, which I printed on sticker paper. Since the elephant silhouette wasn't a GIF (meaning it had a white background around it, so I couldn't combine the elements as easily as I wanted to in Word), I simply ran the paper through the printer twice - the first time to get the background image, the second time to layer the silhouette over top!

The background is a recolored version of an image from this collection and the elephant silhouette is from Graphics Fairy.

Aaaaand that's all, folks! Thanks for making it to the end of my rather lengthy, slightly picture-heavy foodie post! :)

Friday, April 19, 2013

Cake Pop Semi-Flops

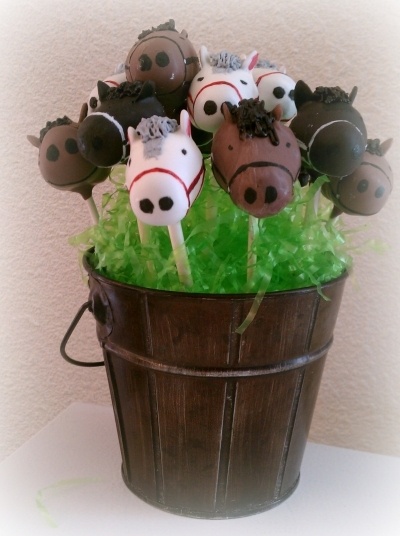
A few weeks ago I went with my family up to PA to celebrate the first birthday of my cousin's twin boys (whom I had never seen!). Let me tell you, they were seriously adorable little guys. Their party had a western theme, with desserts like Rice Krispies hay bale treats and miniature horse cake pops. My mom was especially taken with the cake pops that my (other) cousin made for her little nephews, especially since her annual Reading Rodeo was approaching. So, we decided to test out our cake-pop-making skills a few days after the party. Our first step was research on Pinterest (of course). Mom found a few images for inspiration:

Source: web.stagram.com via Shadow Creek on Pinterest

Source: cakecentral.com via C on Pinterest

Yeah, they are pretty cute, huh? Mom decided to try making ones that are a bit L-shaped, so we started out by taking our pre-baked, pre-crumbled cake and mixing it with icing until it held together while still being a bit crumbly. Then we started pinching out little bits and rolling/shaping them into the little L's for our horse heads (feel free to insert a Godfather reference here). They don't necessarily look very... appetizing in the pics below, but I faithfully rendered each step of the process for posterity (you can click to enlarge - Blogger's sizing options are super limiting, and I already messed up this entire post once by thinking I'm an HTML master... which, sadly, I'm not):

Step Two: Mix cake and icing...
Step One: Bake, scrape, and crumble!


... and mold into L-shaped horse heads!


So... yummy...?


Once we had our horse heads prepped, we melted some chocolate almond bark and prepped our lollipop sticks (you dip them in the chocolate, then insert them into the bottom of your pop - I suppose it strengthens the attachment?). After placing them in the freezer for 20 minutes, we were ready to coat the pops with chocolate. We melted more almond bark and dipped our pops in the chocolate, which was pretty thick, so it dried a little unevenly in places... While it was still cooling/hardening, we pressed candy eyes (yup, they're back!) into each side of the heads. Despite our best efforts, the placement was off a bit on some... At any rate, we eventually had some funny-looking horse heads drying on our cake pop stand, which we bought from Wal-Mart:

Step Three: Melt almond bark...
...and dip sticks, then insert in pops!
Step Four: Coat pops in chocolate, press on eyes.


Don't... let... them... touch!


Once all the pops dried, they were ready to be iced so that they resembled horses... and not dinosaurs... We added manes and ears, bursting into peals of laughter in the resulting personalities such finishing touches created. We also added little nostrils with black food coloring paste and a toothpick.

Candy eyes and oatmeal ears!
^_^


This was our exemplar... which should tell you something...

Well, are we going to go into the cake pop biz? Uh, no. Mom made up a fun little reason for the more deformed pops (not pictured... because they were embarrassing!) - it went something along the lines of "These cake pops aren't the same - they are all different. And some look like they were in a car accident." And, bless them, six-year-olds don't really care what cake pops look like. Some of them actually got a kick out of the story and deliberately chose the more disfigured horses to consume. And, I must admit, they were delicious, albeit a bit too ambitious for my dear mother and me. :)