Showing posts with label photos. Show all posts

Friday, June 14, 2013

DIY Photo Booth

So, you want to have a photo booth at your party, but you don't want to spend something like $300? Me too. So, here's what I did! First, I identified elements that I wanted in my photo booth: an oversized frame, fake mustaches, and costumy props. Then, I began my hunt. First up, an oversized frame. I knew that my best bet was a thrift store, and that I would probably have to buy the artwork within the frame. After a few strikeouts (some shops apparently still ascribed value to the artwork displayed in the frame, which I viewed as a byproduct), I found my gem:


Ugly, no? And super discolored, as I discovered when disassembling it. But here's the draw of this baby, besides its lovely hugeness:


Ya can't beat that, let me tell you! After I took out (and tossed) the old artwork and its accompanying rusty staples and hang wire, my dad took over painting the frame. He primed it first, since it was originally covered in a flaky finish, then painted it a flat black - voilà, it was exactly what I wanted!

Clipping and stripping the wire
Tugging out a million rusty staples
Painting first coat

Note: I used wrapping paper as a background for my photobooth, since I didn't want to purchase fabric (which can be expensive and not as reusable). It worked, but it was a little touch-and-go. Not sure if I would do it again, so I won't really go into how I set it up (and then improvised, and then made it work lol).


All done (the animals will be another post)! Also - do you spy my parents' color-themed pup? :)

While I was securing my frame at Goodwill, I stumbled upon a fedora that was only $1, so it came home with me, too! Mom and I scoured it out with disinfectant, and at her suggestion, I spray painted it to better match the black-and-white theme. It was a little... crunchy, but that was no big deal (it's only one night, and one photo, really). I paired it with a black feather boa at the party (leftover from this year's flapper Halloween costume).
All disinfected and awaiting spray paint!


Original color


Finished product (with feather accent tucked back in)

I also wanted a mask on a stick to go along with my mustaches - I picked out a decorate-yourself mask at Michaels for $3 (a bit of a splurge, haha), and my mom found a sheet of scrapbook paper that looked like netting. She trimmed it out, mod-podged it onto the mask, and then used glitter glue to outline the edges in sparkly silver. And that feather trimmed with black sequins? Yeah, it was also made with materials that we already had on hand. I told you, crafting and hoarding are like cousins.

Mask in progress!


The finished product! We attached the mask, along with mustaches made simply from black cardstock, to miniature dowel rods that my dad picked up from work. I displayed them in an upcycled Prego pasta sauce jar (it had a narrower mouth than Mason jars typically do).

The display at the party!

So, for roughly $10 (and that's rounding up!), I was able to create my own version of a photo booth! I just left my camera on the table next to the display for folks to take pictures with, then I 'developed' them in black and white, like the one below of me and Kathryn!


Vintage Photo Displays

Following a tip from my bestie Martha (Stewart), I searched the Library of Congress' photograph archive for vintage pictures to use for my party decorations. I entered in my search terms and received tons of results! Tip: Check the box " Larger image available anywhere" and select Gallery or Grid views to make your searching a bit easier!

Once I had downloaded and printed my photos, I decided on two display projects, inspired by the following Pinterest pics:


Photo Display #1: String(ed?) Photo Frame
And here is where I launch into a tribute to my father's skills - knowing I wanted to recreate the framed photo-strings idea above, he took some leftover molding and made me a frame one Saturday afternoon. How awesome is that? Once the frame was complete, we laid out the photos to gauge where to string the twine - they fit perfectly!


After marking out points on the back of each side of the frame, we used a staple gun to attach one continuous string of twine, threading it back and forth across the frame.

We marked line points with a Sharpie
Threading the twine


Why yes, that's a reinforced corner (my dad rocks)
I used mini clothespins that I picked up at Hobby Lobby to hang my pictures on the twine, grouping them by size (portrait versus landscape orientation) to match the strings (some were spaced farther apart than others, allowing for taller photos). I was originally going to hang the frame in front of my brother's outdoor shed (I even came up with an ingenuous hanging plan that involved using black plastic funnels to push the hanging frame away from the shed doors so it floated), but when we moved the party indoors it ended up propped on his fireplace mantel in the basement. Still, it looked pretty awesome. And, since I used mostly items that I had on hand (except for the clothespins, which were $3), it was super cheap to make! Here are some pictures of the finished product (sorry for the atmospheric-but-not-photogenic lighting!):


Photo Display #2: Photo Carousel
My second photo display project was inspired by a series of carousel pictures I found in the LOC's photo archives. I edited them to make them black and white and cropped out as much of the measuring equipment in the pictures as I could (they were documentation photos, so there were measuring devices in each photo). Once I had fixed them up, I printed them on cardstock and cut them out, rounding their corners (if I haven't gushed about corner rounder punches before, allow me to do so now: THEY ROCK).


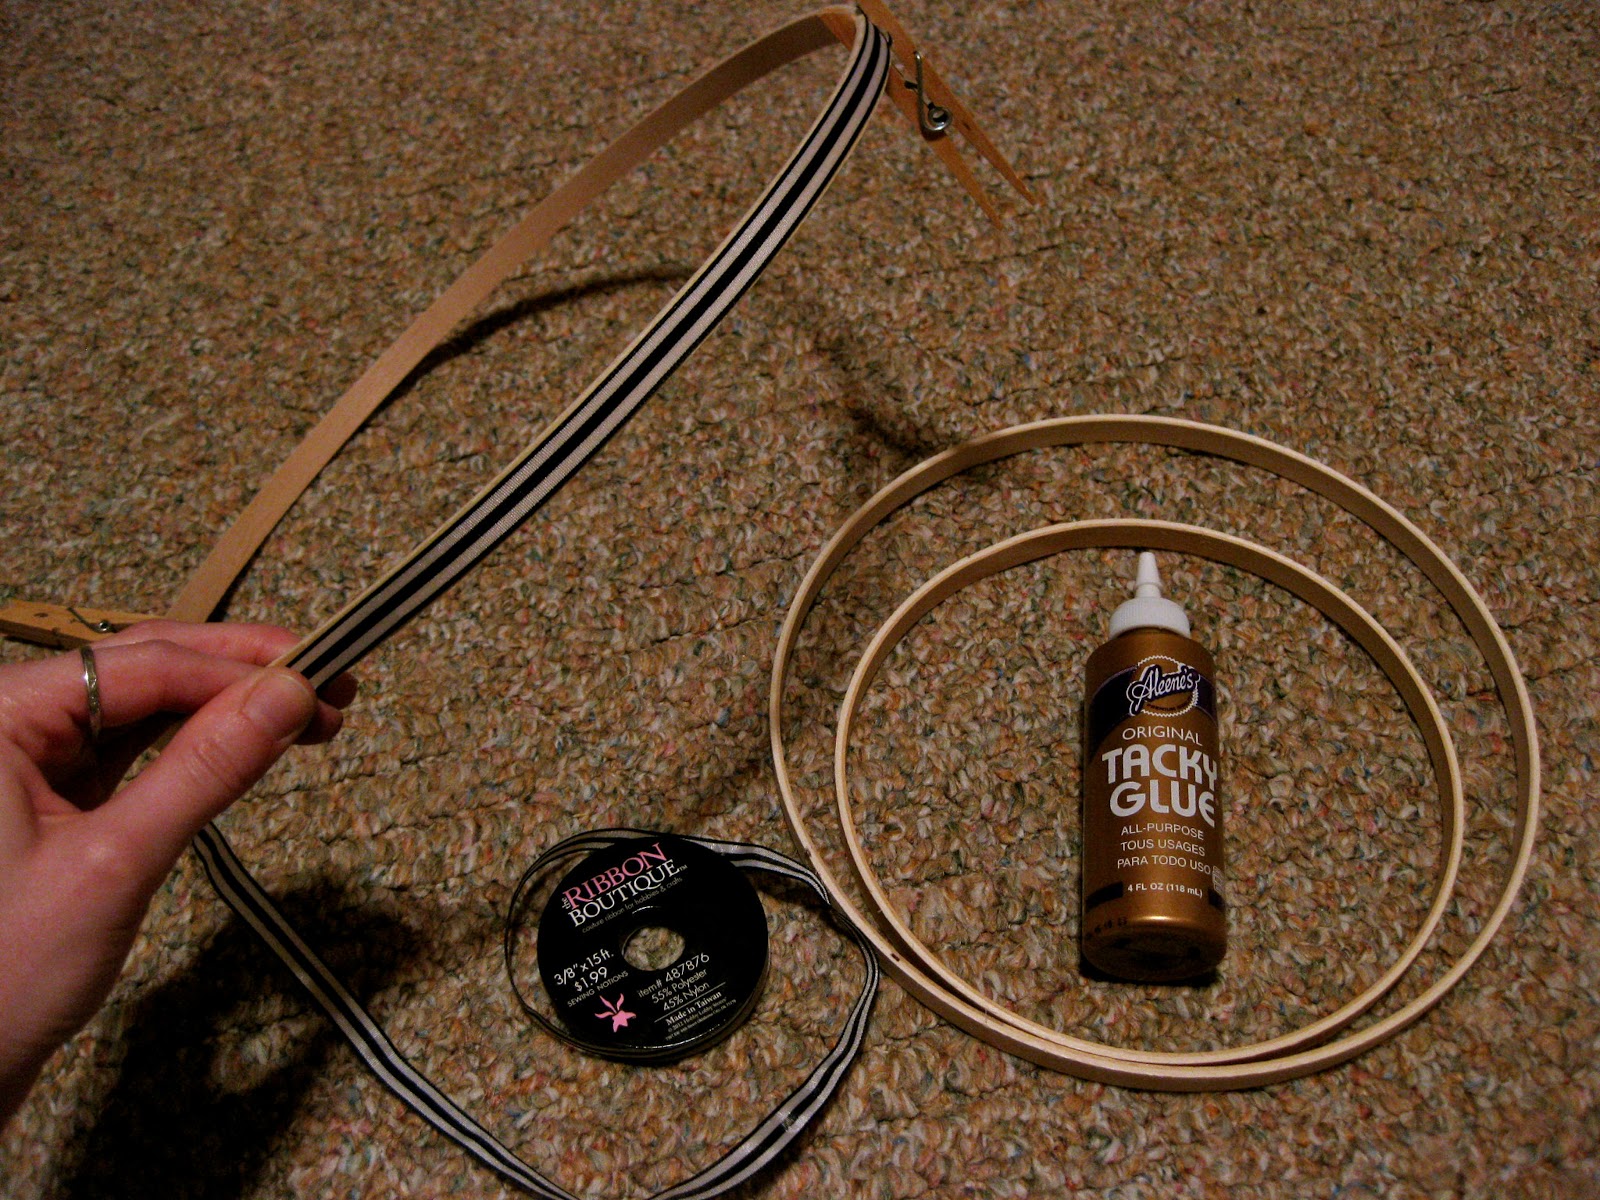
Remember the embroidery hoops I purchased for my paper airplanes game? I used the inner hoops for this project (money-saving!). My first line of business was to glue some decorative ribbon that I found at Hobby Lobby to the outer rim of the hoops and allow them to dry. Clothespins worked really well to hold the glued ribbon in place as well as elevate the hoops for drying.


Once the ribbon edging dried, we hot-glued mini-clothespins (from the same package as the ones used for the string photo frame project) around the edges to hold the carousel pictures. We had already measured out where we wanted the mini-clothespins to go, using the carousel pics as a placement guide. To help with the color scheme, I used a Sharpie to color their fronts black beforehand - it took less than a minute and complemented the ribbon nicely.  Once the mini-clothespins were attached, we used twine to attach all three hoops - once we tied four strands to the top (biggest) hoop, we hung it from the pull chain of a ceiling fan in order to better hang the subsequent hoops. We followed the line created by the initial four strands so that each layer hung straight. While it was made to hang from a center pole staked into the ground, it just as easily converted to an indoor mobile, which I ended up hanging on a reading light. Check it out!


Friday, February 1, 2013

Photo Letters

Thanks to Laurie for reminding me about this one! A fairly recent trend (within the past few years at least) has been photo letters - you know, where people spell out words with artsy photos of objects that look like letters? Groupon still sends me deals from time to time for "Custom Alphabet Art" - and seriously, it's overpriced. I mean, this one was a deal at $50 (originally $150!) and this one was $60 for $135 worth of art. I'm sure the majority of the cost is in the framing, but if you can get away with matting (or at least a cheaper frame), this type of artwork is really easy and low-cost. In the past, I've taken two different approaches in creating this type of art - frame first and name first (yes, they rhyme).

Frame First: A few summers ago I found some three-photo frames at really low cost (*cough* Wal-Mart *cough*), and I was struck with the realization that hey, initials consist of three letters! So, I snapped them up and got to work! I knew I wanted to make a piece for my brother, whose initials are T-J-H, so I trekked around the outside of my parents' house in search of my letters. I found the T in a birdbath in the backyard, my J was a decorative lantern hook out front (I removed the lantern for the sake of the photo!), and I discovered an H within the mortar of the front steps. Collected, my original photos looked like this:


For a more polished look, I used iPhoto to recolor them, and the end results were this:


They fit pretty well in the frames, but I will add a word of caution here: Don't zoom in too much! I used my local Walgreens' Photo Center to print the photos, which means mere cents a print; however, it also means a bit of auto zoom/cropping. Add to that any insta-cropping that occurs when you insert the photo in the frame, and you might discover that your letters aren't so crisply defined anymore (which is important - if they bleed off the edge too much, they lose their clarity). My T above was a bit large, but it worked out fine in the end (whew).

For the seventh opening
Name First: In this case, all you need to do is choose your word (or name!) and begin brainstorming. I knew I wanted to make my friend Laurie's name, so I began scouting around for angles and curves around the house - some I found, some I artistically created. ;) The trick with creating an entire name is that it practically necessitates ordering custom matting. I found a 2-pack of 7-opening mats on sale from this site, but I would definitely recommend browsing around to see what's out there. Since Laurie's name is six letters, I added an artsy photo at the end to complete the piece. It's up to individual preference whether or not to take the extra step and frame the finished piece, but I thought it looked nice the way it was (frames can be so bulky... and, let's face it, pricey!). I don't have a photo of the finished product, but here's the next best thing:


As you can see, I made good use of my parents' yard again, but I incorporated a few indoor shots as well. All in all, a project that requires a few steps (pre-planning, taking photos, editing, printing, assembling) but results in a unique, polished bit of artwork that's special to both you and the receiver!

Here is a photo-lettering of my roomie's initials (also shows the three-pic frame mentioned earlier)