To start off, I'd like to clarify that despite the fact that this is my second necklace-making post on this blog, I am definitely not an avid jewelry maker. However, I have been digging the long-chain-with-pendant necklace trend this past year, and lucky for me, it's a pretty easy one to replicate! So, without further ado, I present my easy-peasy steampunk pendant necklace:

Pause. Backtrack. I realize that I might need to clarify the term 'steampunk' for some, so let's take a brief rabbit trail, shall we? Steampunk.com gives a pretty nice definition for the term:
[A] literary genre, or least a subgenre of science fiction and fantasy that includes social or technological aspects of the 19th century (the steam) usually with some deconstruction of, reimagining of, or rebellion against parts of it (the punk).
I know what you're thinking - OF COURSE it started off as a literary thing! And it's true - think Jules Verne, à la The Time Machine:
 |
Source: Travel News
|
The image above illustrates one of the key aspects of the steampunk trend - its ability to transcend media. Steampunk.com gives examples of steampunk games (Bioshock II), steampunk graphic novels (League of Extraordinary Gentlemen), and even steampunk movies (Sherlock Holmes) and TV shows (Warehouse 13). And it doesn't stop there! Which brings me to my necklace, an example of the steampunk design aesthetic:
What with all the cool contraptions in the stories, it was only natural that some people would decide to make some of them (or at least things like them). Thus, steampunk gadgets came into the real world. People have “steampunk’d” everything from computers, desks, telephones, watches, and guitars, to cars, motorcycles, and whole houses. These objects can vary from a grungy look of a forgotten antique to the shiny overwrought newness of a Victorian gentleman’s club. Think brass and copper, glass and polished wood, engraving and etching, and details for the sake of details. So, steampunk is also a design aesthetic. (Steampunk.com)So interesting, right? But, I realize that I probably need to actually start talking about my necklace at some point in this post, so onto a chat about keys. Yes, one of the key elements of steampunk jewelry is an antique key. I've always loved old keys - I would buy them at yard sales when I was a little kid (weird? or telling?). At any rate, I love how popular they've become within the steampunk design aesthetic, especially paired with other classic steampunk elements (compasses, gears, clocks, etc.). Take a look:
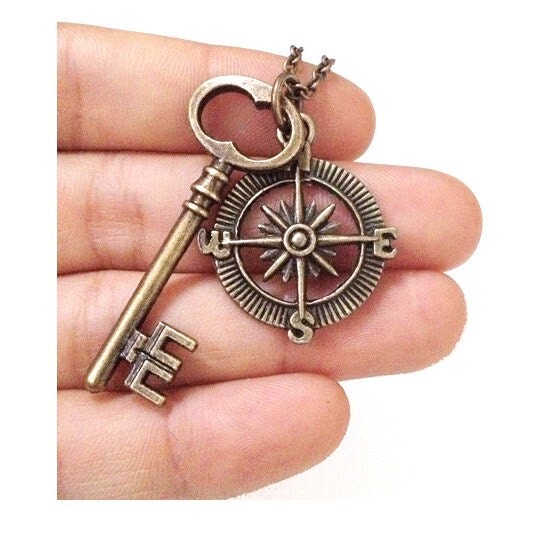 |
| Bronze key/compass combo on Etsy |
 |
| Super steampunk'd key on Etsy |
 |
| Source: dragonweave.com via Marc on Pinterest |
Michaels actually has/had a steampunk section in their bargain aisle, which I visited several times (mostly to lament my inability to figure out uses for various items I wanted... which meant they stayed at Michaels). I did find a set of steampunk keys for $2.00, though, that I snapped up immediately. Pardon the picture quality - my phone is remedial:
 |
| Only $2.00! |
I knew from nosing around Etsy for ideas that I wanted to incorporate another element in my necklace, and this collection of charms in the jewelry section of Michaels caught my eye:
 |
| Not a fan of wings, but the owl was adorable. |
I also picked up some necklace chain (see pics below) for $3.99 that complemented the tone of the key and charm - as it was just chain, it didn't come with a connector. However, these necklaces are long enough to slip over your head, so you don't really need one. I just used needle nose pliers to snip off the length of chain I wanted (around 30" give or take) and then to connect the chain into a loop after slipping on my key pendent. Full disclosure: I initially threaded the chain through the key's preexisting loop, but I didn't like how the key kept twisting sideways with that setup. A jump ring connecting the key to my chain fixed the problem. I ended up using two jump rings in my necklace - one to attach the owl charm to the key (using pliers again) and another to attach the key to the chain so it hung in the right direction.
 |
| Closeup, with real camera |
 |
| In-store, with (sub-par) phone camera |
And there you have it! Here's a quick photo of the hanging length, if you're curious: