Sunday, May 12, 2013

Testudo Treats

As many people know, the official mascot for the University of Maryland is the terrapin (or a terp, for short... er, yeah). As fewer people know, I'm about ready to graduate from UMD with my Masters degree (HOORAY), which also explains the delay on this post. To share the happiness and indulge in sentimentality, I wanted to make some little goodbye/good luck/congrats-fellow-graduate gifts for those I'm leaving behind, and I came up with these little treats:


Here's the backstory: Back in February my mom gave me a little Valentine's Day gift that mixed together some of my favorite things - owls and candy! She was also proud of her bow-making abilities (check out that awesome and complicated-looking bow in the upper left-hand corner!). I liked the whole concept of the treat bag so much that I didn't even eat the M&Ms until last month, wanting to keep the design intact. I knew that I wanted to replicate it somehow for my end-of-the-semester gifts to grad school friends, so I began thinking about how I wanted them to look and what sort of candy to fill them with. Reese's Pieces were the obvious choice, as they incorporate most of UMD's colors (ok, not red, but look at the UMD logo and Testudo image, and you'll see what I mean). For the top of the treat bags, I selected my favorite crafting medium - book pages!

I've always been a fan of the stamping-on-book-pages look (evidence), like the Etsy pieces below from RococcoCo and collageOrama:


Happy Fourth!
I looked far and wide for a suitable turtle stamp for my treat bags... but no such luck. However, last Fourth of July, my mom and I created some decorations like this little twirler (right) by running a vintage book page through our home printer - pretty sweet, huh? So, when I hit a dead end in the stamp search, I came up with the next best thing - printing off color turtle images on pre-printed cardstock. Why not use actual book pages? Well, for one, I definitely wanted cardstock for the treat bag toppers (for sturdiness), and most books aren't printed on cardstock. Also, it was much easier to print off a set of four toppers on a sheet of cardstock (and then cut them apart) than trimming down four pages (I made 45 treat bags total, during the semester crunch, so easier = better).

I'll break down the steps for assembling below, starting with a picture of my "stamp" contenders:


I ultimately settled on the more detailed image (on right), and while I liked the red version a lot, it was a bit more maroon than I wanted (UMD's color is a solid red), so I opted for green in the end.

Step One: Making Toppers. After figuring out the dimensions of my treat bags from Wiltons, I set up a page on Microsoft Word with screenshots of Alice in Wonderland (taken from the free eBook on Google Books - I downloaded the PDF). After printing off several copies of these pages on white cardstock, I prepped my second Word document, on which I arranged my turtle 'stamps.' I simply used a clip-art from Google Image search, and recolored it via Word's picture tools menu - super low tech, here. Once my second sheet was prepped, I ran the same sheets of cardstock through the printer, layering the turtle images over the Alice text. So, they came out like this:
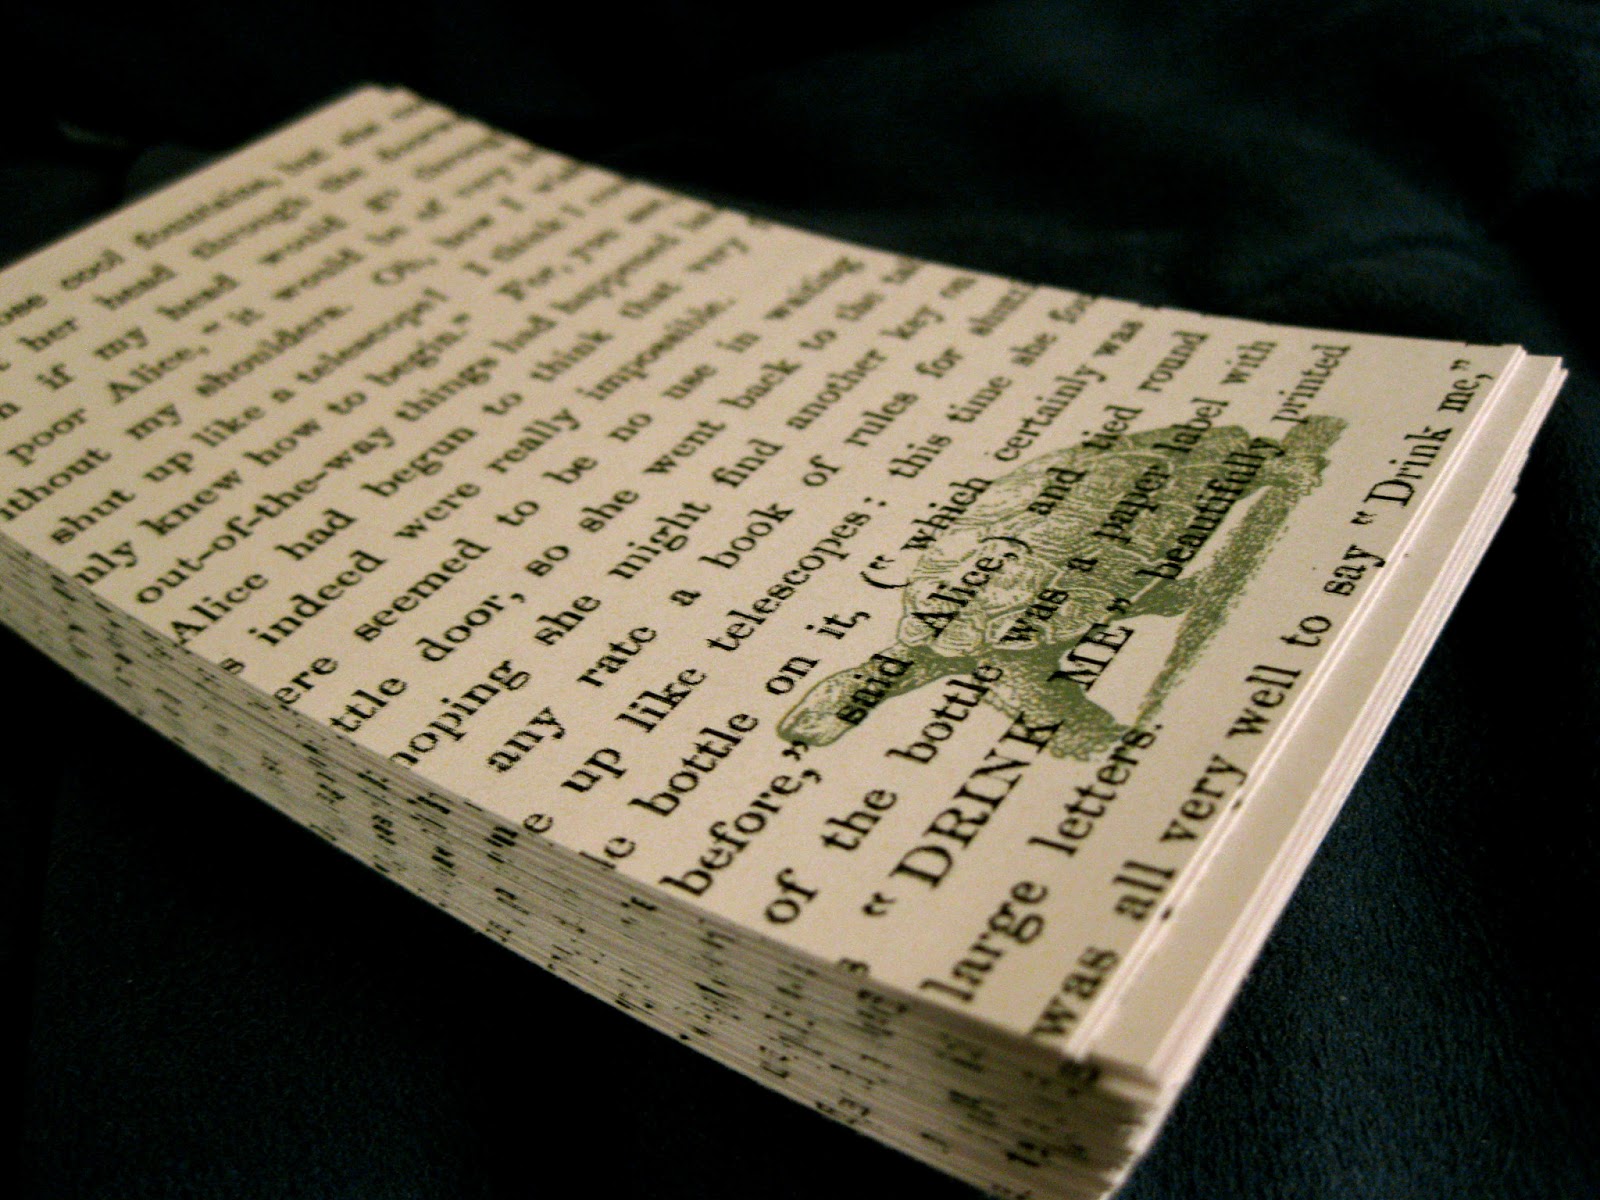
After they were trimmed down to size
 

Step Two: Filling Treat Bags. A little goes a long way with these, which was good for my budget. I just dropped in a little scoop of Reese's Pieces (after I peeled open the bag - curse you, static cling!).


Step Three: Attaching Toppers. I prepped my toppers by folding them all in half so that they were ready for this step. Simply sandwich the top of the bag between the two flaps of the topper (make sure there's enough to catch with your stapler), press the flaps together, and staple 'em shut!


And there you have it! It took me roughly three bags of Reese's Pieces to fill up 45 treat bags, in case you were wondering (I had a hard time guestimating, and ended up having to make a quick return to Target!). I used the back of the toppers to write little notes to recipients with a red Sharpie, which showed up pretty well. I am definitely planning on reusing this idea when I'm back in the classroom - it's really easy to reproduce in bulk, especially if you don't have such an elaborate topper-making process. And they are pretty cost-efficient, so win-win. Plus, people really enjoyed getting them:


Testudo Treats!

Friday, May 3, 2013

Repurposing IKEA Leftovers

This is an old project, and it's more resourceful than creative. Let's blame it on post-defense, pre-graduation weariness, shall we? To be fair, though, it IS about one of my proudest moments of handiness. You see, when my roomie and I were moving into our current apartment, we opted to fill in our furniture gaps with IKEA pieces (it helped that there's an IKEA less than 3 miles away). One such piece was a TV stand, a less-than-awesome picture of which is below:

This was taken pretty soon after we moved in, hence the empty picture frames and general sparsity. 

Well, as all IKEA shopper-builders know, when you buy something from IKEA that's a bit more complicated than, say, a mirror or rug, you have to buy it in separate parts - for the TV stand, that meant the stand/cabinet (I'm pretty sure it came with doors... but possibly not) and the plinth. Long story short, the roomie and I got a little turned around in the plinth aisle and grabbed the wrong size (because seriously, they all look the same in cardboard boxes). We realized this after we built the ENTIRE stand... so we went with it. Hence the little jut-out ledge at the bottom.

At the end of our IKEA build, we had a leftover piece of wood, which is usually not a good sign. We had attached the stand to the plinth and nixed what was originally the bottom of the stand, as it was unneeded. I still haven't figured out if the leftover plank was due to the fact that we had the wrong plinth or because adding a plinth is optional in the first place (you can do wheels instead). When I saw that extra piece of wood (which matched our living room) languishing away in my roomie's bedroom (it was really her TV stand, so it was her extra piece of wood), I came up with an idea.

Step One: Pester roomie to give me the piece of wood (super easy, because she didn't care).

Shelf Bracket
Step Two: Research brackets. Yes, brackets - we are building a shelf! My piece of wood was 33.25" by 14.25" and roughly 3/4" thick. After looking around and talking it over with my dad (handyman extraordinaire), I realized that I didn't really need anything fancy or expensive - I simply went to Lowe's and picked up a few of these babies. Since I was pretty sure I wasn't going to be using the shelf for anything heavier than mail, the 100lb capacity was plenty, and I liked their industrial look.

Step Three: Research wall anchors. I actually did this at the same time as my bracket research, since I knew that our apartment had hollow plastery walls that would need anchors. I honestly don't remember what kind I bought - I spoke with a worker at Lowe's after I picked out my brackets, and he helped me select the kind I needed, along with a few short screws to attach the brackets to my shelf.

Click to Enlarge
Step Four: Planning/sketching. I had to figure out where I wanted the shelf (centered) and how high. I then researched how to go about assembling my shelf (Do I attach the brackets to the wall or shelf first? Which end of the bracket attaches to the shelf - long or short?). There are all sorts of how-to's online - step-by-step articles (here's one on putting in wall anchors) and videos abound. Since I did this all around a year and a half ago, I'm a bit fuzzy on the details, but I simply followed the directions I found online that matched my situation (L-brackets, wooden shelf, hollow wall). The tools I used were a drill (I have a cute little Black & Decker one I picked up in Target awhile back), a rubber mallet, and a level, combined with the anchors, screws, and brackets I purchased.

Click to Enlarge
Once I had all my materials and had read/watched my how-to's, the project itself didn't take long at all - by the end of the afternoon, we had a new shelf for the landing strip area of our apartment. I still love it, it works really well to transition the living room into the dining room (which have different styles), and we use it all the time for mail and notes to each other. And guess how much this project cost, total? If you clicked on the wall brackets link (and saw how cheap they are!), you might have an idea already. It cost $6.52. Yup, six dollars and fifty-two cents (thanks, MD sales tax). Full disclosure, the vase and flowers I picked up at Michaels, I bought the clock from Big Lots, and the artwork is actually a framed postcard of a Sargent painting from the National Gallery of Art downtown. But, you get the picture - and now, scroll down for a few more of 'em!

Can you spot the owl pillow from a previous project? :)


Friday, April 26, 2013

Steampunk Necklace

To start off, I'd like to clarify that despite the fact that this is my second necklace-making post on this blog, I am definitely not an avid jewelry maker. However, I have been digging the long-chain-with-pendant necklace trend this past year, and lucky for me, it's a pretty easy one to replicate! So, without further ado, I present my easy-peasy steampunk pendant necklace:


Pause. Backtrack. I realize that I might need to clarify the term 'steampunk' for some, so let's take a brief rabbit trail, shall we? Steampunk.com gives a pretty nice definition for the term:
[A] literary genre, or least a subgenre of science fiction and fantasy that includes social or technological aspects of the 19th century (the steam) usually with some deconstruction of, reimagining of, or rebellion against parts of it (the punk).
I know what you're thinking - OF COURSE it started off as a literary thing! And it's true - think Jules Verne, à la The Time Machine:

Source: Travel News

The image above illustrates one of the key aspects of the steampunk trend - its ability to transcend media. Steampunk.com gives examples of steampunk games (Bioshock II), steampunk graphic novels (League of Extraordinary Gentlemen), and even steampunk movies (Sherlock Holmes) and TV shows (Warehouse 13). And it doesn't stop there! Which brings me to my necklace, an example of the steampunk design aesthetic:
What with all the cool contraptions in the stories, it was only natural that some people would decide to make some of them (or at least things like them). Thus, steampunk gadgets came into the real world. People have “steampunk’d” everything from computers, desks, telephones, watches, and guitars, to cars, motorcycles, and whole houses. These objects can vary from a grungy look of a forgotten antique to the shiny overwrought newness of a Victorian gentleman’s club. Think brass and copper, glass and polished wood, engraving and etching, and details for the sake of details. So, steampunk is also a design aesthetic. (Steampunk.com)
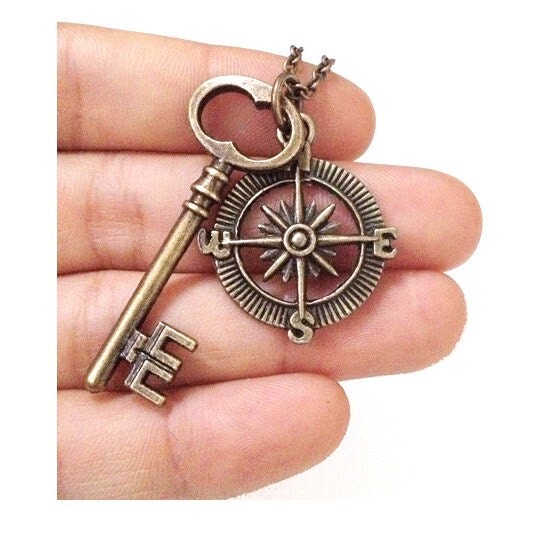
So interesting, right? But, I realize that I probably need to actually start talking about my necklace at some point in this post, so onto a chat about keys. Yes, one of the key elements of steampunk jewelry is an antique key. I've always loved old keys - I would buy them at yard sales when I was a little kid (weird? or telling?). At any rate, I love how popular they've become within the steampunk design aesthetic, especially paired with other classic steampunk elements (compasses, gears, clocks, etc.). Take a look:

Bronze key/compass combo on Etsy
Super steampunk'd key on Etsy

Source: dragonweave.com via Marc on Pinterest


Michaels actually has/had a steampunk section in their bargain aisle, which I visited several times (mostly to lament my inability to figure out uses for various items I wanted... which meant they stayed at Michaels). I did find a set of steampunk keys for $2.00, though, that I snapped up immediately. Pardon the picture quality - my phone is remedial:

Only $2.00!

I knew from nosing around Etsy for ideas that I wanted to incorporate another element in my necklace, and this collection of charms in the jewelry section of Michaels caught my eye:

Not a fan of wings, but the owl was adorable.

I also picked up some necklace chain (see pics below) for $3.99 that complemented the tone of the key and charm - as it was just chain, it didn't come with a connector. However, these necklaces are long enough to slip over your head, so you don't really need one. I just used needle nose pliers to snip off the length of chain I wanted (around 30" give or take) and then to connect the chain into a loop after slipping on my key pendent. Full disclosure: I initially threaded the chain through the key's preexisting loop, but I didn't like how the key kept twisting sideways with that setup. A jump ring connecting the key to my chain fixed the problem. I ended up using two jump rings in my necklace - one to attach the owl charm to the key (using pliers again) and another to attach the key to the chain so it hung in the right direction.

Closeup, with real camera
In-store, with (sub-par) phone camera


And there you have it! Here's a quick photo of the hanging length, if you're curious:

Friday, April 19, 2013

Cake Pop Semi-Flops

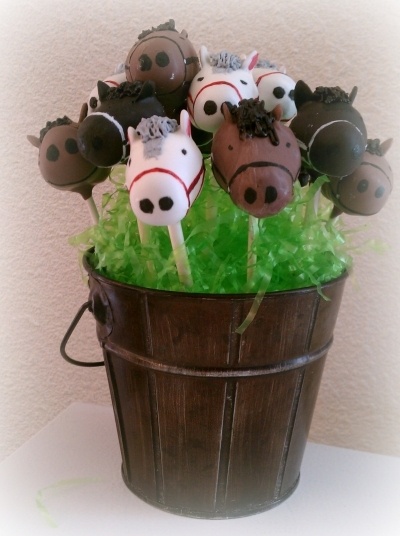
A few weeks ago I went with my family up to PA to celebrate the first birthday of my cousin's twin boys (whom I had never seen!). Let me tell you, they were seriously adorable little guys. Their party had a western theme, with desserts like Rice Krispies hay bale treats and miniature horse cake pops. My mom was especially taken with the cake pops that my (other) cousin made for her little nephews, especially since her annual Reading Rodeo was approaching. So, we decided to test out our cake-pop-making skills a few days after the party. Our first step was research on Pinterest (of course). Mom found a few images for inspiration:

Source: web.stagram.com via Shadow Creek on Pinterest

Source: cakecentral.com via C on Pinterest

Yeah, they are pretty cute, huh? Mom decided to try making ones that are a bit L-shaped, so we started out by taking our pre-baked, pre-crumbled cake and mixing it with icing until it held together while still being a bit crumbly. Then we started pinching out little bits and rolling/shaping them into the little L's for our horse heads (feel free to insert a Godfather reference here). They don't necessarily look very... appetizing in the pics below, but I faithfully rendered each step of the process for posterity (you can click to enlarge - Blogger's sizing options are super limiting, and I already messed up this entire post once by thinking I'm an HTML master... which, sadly, I'm not):

Step Two: Mix cake and icing...
Step One: Bake, scrape, and crumble!


... and mold into L-shaped horse heads!


So... yummy...?


Once we had our horse heads prepped, we melted some chocolate almond bark and prepped our lollipop sticks (you dip them in the chocolate, then insert them into the bottom of your pop - I suppose it strengthens the attachment?). After placing them in the freezer for 20 minutes, we were ready to coat the pops with chocolate. We melted more almond bark and dipped our pops in the chocolate, which was pretty thick, so it dried a little unevenly in places... While it was still cooling/hardening, we pressed candy eyes (yup, they're back!) into each side of the heads. Despite our best efforts, the placement was off a bit on some... At any rate, we eventually had some funny-looking horse heads drying on our cake pop stand, which we bought from Wal-Mart:

Step Three: Melt almond bark...
...and dip sticks, then insert in pops!
Step Four: Coat pops in chocolate, press on eyes.


Don't... let... them... touch!


Once all the pops dried, they were ready to be iced so that they resembled horses... and not dinosaurs... We added manes and ears, bursting into peals of laughter in the resulting personalities such finishing touches created. We also added little nostrils with black food coloring paste and a toothpick.

Candy eyes and oatmeal ears!
^_^


This was our exemplar... which should tell you something...

Well, are we going to go into the cake pop biz? Uh, no. Mom made up a fun little reason for the more deformed pops (not pictured... because they were embarrassing!) - it went something along the lines of "These cake pops aren't the same - they are all different. And some look like they were in a car accident." And, bless them, six-year-olds don't really care what cake pops look like. Some of them actually got a kick out of the story and deliberately chose the more disfigured horses to consume. And, I must admit, they were delicious, albeit a bit too ambitious for my dear mother and me. :)

Friday, April 12, 2013

Clowns and Gingerbread Men

 Another collaborative post with my mum - and this one's full of whimsy. ;) First up - paper plate clowns. For a creative writing assignment in English class, my mom's first graders had to write stories about the circus - and what better way to display these mini narratives (we're talking two-sentence stories here) than with clowns?

Silly clowns made his 'famy' happy! Well, he used enough letters to get the point across. ;)

Draw Head and Neck on Underside
Aw, isn't it clever? While the one above came out pretty well, they all had their own uh, personalities - haha. Mom found the idea of creating people from paper plates in The Mailbox magazine (it was originally paper plate witches for Halloween) and adapted it to suit her Big Top needs. It's a pretty simple craft - you just take a paper plate (she used dessert plates), draw a head and neck on its underside, and cut along the pattern (see right). Blue plates worked well for the clown bodies and offered a nice contrast with their white undersides.

Flip Plate - Attach Head Opposite Break in the Circle
After cutting the plate into two pieces, flip the semi-circle part back over (blue side up) and attach the clown head directly across from the break in the rim, creating a clown figure with a head, shoulders, and arms. Then it's time to decorate! Kids drew on facial features with crayons and learned the tricky art of clown mouths (my mom showed them that they are like hot dogs). The crazy clown hair is made of crinkle cut paper shred (what a mouthful!). Finishing touch - they drew and cut out mittens for hands to 'hold' their circus stories in place.


You know what they say - no two clowns are alike! I personally think the one below is hilarious and slightly mischievous (and check out the one in the lower left-hand corner!).


Here's another thing they say (or they should): no two gingerbread men are alike! Or at least the ones my mom's first graders made. Let me tell you the story of *echoing voice* THE EPIC GINGERBREAD MAN COMPETITION.

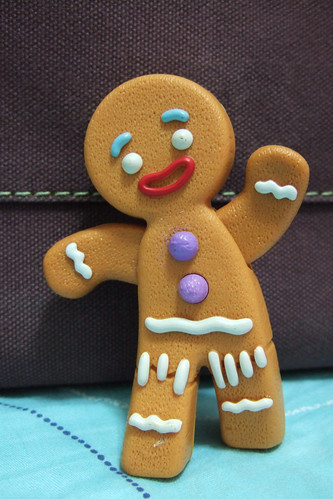
Gingy from 'Shrek'
It all began when my mom's students read the classic story of the gingerbread man in their reading book (the link is a reading by John Krasinski, which means it's awesome). Mom thought that giving her first-graders gingerbread men of their own to personalize would be a fun tag-along craft - she made 8-inch die cuts of gingerbread men using brown construction paper, then passed them out to her students with the instructions to decorate them any way they wanted. She fully expected them to be little mini-me's of Gingy, however her kids surprised her by how ridiculously creative they are - she had swashbuckling gingerbread men, dressed-to-the-nines gingerbread girls, and even a ninjabread man! Because they did such a great job, she decided to turn the activity into a contest in order to recognize those who worked so hard on their gingies. She numbered all seventeen gingies and placed them on a table outside her classroom with a sign that said "Vote for Your Favorite!" The voting stand was complete with pens and slips of paper upon which voters noted their favorites, then tucked them into a little collection box. And as you may have noticed, letting the will of the people decide the winner saves the teacher from having to do so. ;)

The turnout was enormous, especially given the complete lack of advertising (though Mom's single sign was in the imperative mood). Beyond her students, who went around campaigning for their gingies, other students eagerly took part in the democratic process, with entire classes filing by and voting on their way to specials. Then it reached beyond the school - one father was dragged from his car by his daughter before school one morning to vote for her gingerbread girl, and when he discovered that the paper slips had run out (which happened a few times), he improvised a ballot with his business card. A two-year-old even cast her vote - when her older sister asked if she was allowed to do so, my mom asked how the toddler would communicate her selection. The sister's response was simple: "She grabs the things she likes, so whatever gingerbread man is her favorite, she'll just grab it." Which is exactly what happened.

At the end of the week, the votes were tallied. In a mere four days, 477 votes were cast. That's over 100 votes a day, in a PK-8 school of roughly 450 students. And I should note that my mom's classroom is not really in a high-traffic area. Who won, do you ask? Before placing the gingies out for voting, my mom took a picture of the ones she felt were the most original - turns out that the top three made her cut. Now, does that lady know her gingies or what? :) Check them out below:

1st Place went to our grass-skirt-wearing Native American (9), Ninjabread Man (8) came in 2nd Place,
and our pig-tailed Gingy Gal (3) came in 3rd Place

Hmm... anyone else in the mood for cookies and milk?

Sunday, April 7, 2013

Door Décor: Guest Post

My mom sent me a photo of her door décor earlier this week, and I had to do a mini-post about it because I think it's so lovely! Plus, she put it together for less than $7 (and over half of that was for a can of spray paint!), which is pretty awesome, imo. Check it out! The component/price breakdown is below.


Frame - purchased from a thrift store, spray painted gray ($1 for frame, $4 for spray paint)
Wooden Letter H - purchased from thrift store [she ended up speckling it gray later] ($.50)
Flowers - purchased from Dollar Tree ($1)
Ribbons and buttons - on hand (free!)
Sticks - from the yard (free!)
Metal Washers* - on hand (free!)

Project total = $6.50

*The frame leans a bit due to the weight imbalance, so my dad attached washers to the back of the frame to even it out.

Friday, April 5, 2013

Speckled Egg Cake

I like to follow craft blogs - they are both fun little escapes and an occasional source of inspiration. And unlike Pinterest, the good ones always have step-by-step instructions for creating the craft (usually by the blog author, detailing the minutia and mistakes alike). Please note, however, that I have discovered there are essentially two different kinds of craft blogs - those whose ideas I see and think Ooh, I could do that - perhaps even better! (see one of my new favorites, Dollar Store Crafts) and those whose ideas I see and think I'd like to take a shot at that, and we'll see how it goes (see any DIY craft from my bestie Martha). This cake craft was definitely one from the latter category, but I'm still pleased by it. That being said, no, I will not show you the inspiration image. You'll have to leave this page and go see it for yourself because I'm not offering up a side-by-side comparison. ;)

At any rate, I've been baking cakes since I was a kid - don't ask me about my frozen dinner last night (and the night before, and the night before...), but I have a solid set of baking skills that will get me through many a future potluck. So, without further ado, here's my basic set of skills put to use to make a speckled egg cake in honor of spring (yeah, that theoretical concept).

Step One: Bake a cake! Seriously, pick up a box of Duncan Hines or Pillsbury (whatever is cheapest, imo) and follow the directions. We (my mom and I) made two round chocolate cakes because thanks to our brief stints in the food services industry, we now know how to assemble layer cakes. Golden Corral ftw. Tip: Line the cake pans with parchment paper beforehand - it makes it easier to pop out the layers.

Step Two: Frost the cake! While the cakes were baking/cooling, I scooped the vanilla frosting out of its tub (we had an extra-large one - otherwise you will need maybe 1 and a half normal tubs of frosting - layer cakes are a bit high maintenance when it comes to frosting, I know) into a bowl and added blue food coloring. My mom had the paste kind, which I haven't worked with much, so I ended up putting too much in my first time, and there's no going back! So, our cake is a bit more vibrant than the inspiration image, which isn't a big deal.

After the cakes have cooled, simply frost one cake entirely (you can keep the top thin and imperfect, since it's the layer part), then stack your second layer on top of your first and frost it. I ran my knife under warm water a few times to get the icing looking as smooth as possible, since we aren't professional cake-bakers like my friend Ashleigh who bakes cakes for clients on the side (of teaching high school and working on her Masters!). And here's our finished result:


Step Three: Speckle the cake! First I had to whip up the paint. Yup, there's chocolate paint in this recipe! The mixture from my inspiration site is as follows:
In a small bowl, mix together 1 TB of cocoa powder with 1 1/2 TBs of vanilla. Stir well until cocoa is completely dissolved and you have a thin, chocolate paint.

Once it's all mixed up, take a clean (unused) paintbrush or toothbrush, cover the surface of your work space (i.e. kitchen counter), and flick your paint mixture on your cake. You should probably test it out first, and watch out for drops of the mixture from your painting tool - definitely had a few of those happen. And, yes, it's messy! Also - the chocolate paint is NOT like icing, meaning you shouldn't taste the leftovers afterward. My mom found that out the hard way.


Step Four: Decorate the cake! For our finishing touches we added Whoppers Robin Eggs around the edge to cover up the messy bottom (and heck, more candy is always better!) and made a nest out of chocolate icing on top, with more Robin Eggs inside. Pretty easy recipe - the only additional work was dying the icing and the speckling part. And picking your favorite cake/icing flavor combo pretty much guarantees your satisfaction with the finished result, even if it comes out a hot mess.

The menfolk of our family were duly impressed, except my grandfather didn't eat his Robin Eggs. Lame.